Showing posts with label doomsday. Show all posts

Friday, January 24, 2014

Why Bury? A mirror of How to Bury Your Stuff dot com

Why Bury? A mirror of How to Bury Your Stuff dot com

How to Bury Your Stuff: The Ultimate Guide to Burying Your Valuables

Because no one can take what they cannot find
00 homepageWhy bury? I’ve been asked that question countless times over the years and my answer is always the same. Because if done properly, it’s the ultimate security for your valuables; not only is it cheaper than any alternative but nothing else is as secure, period.
Hiding your valuables under your mattress or in your sock drawer does not protect against fires or natural disasters like tornados. Safety deposit boxes can be costly in that they are an ongoing expense. They can only be accessed during the bank’s business hours and depend on functioning electricity. Home safes are expensive; they do not always properly protect your valuables against fires or floods and can be easily defeated by any intruder with the proper cutting tools. By burying your valuables underground, one can guarantee that his or her most precious possessions are forever protected against theft, fire, extreme weather, most natural disasters and even the collapse of the electrical grid.
Prior to around 1998, anyone who buried anything underground was considered paranoid by mainstream society. The Y2K or “Millennium Bug” changed that. This was the belief that on December 31st 1999, all computer systems worldwide would crash. Survivalism or “Prepping” as it is now called, started to become more popular. Tabloids like CNN started to push scary stories about new diseases and imminent natural disasters. Television shows and movies geared around apocalyptic themes grew in popularity, and sensationalism combined with mistaken beliefs about the Mayan New Year would push worldwide survival spending past $500 billion during the 2012 fiscal year.
I originally created this website with the intent of helping everyone in every demographic group secure their most valuable possessions. But I am not naïve, I realize that the majority of my visitors will be survivalists and doomsday preppers. This brings me to another reason for burying your possessions; an apocalypse of some sorts. Collapse of the world’s economy, zombies, post peak oil, Fascist gun confiscations, WMD’s, disease or pandemic, mass starvation and civil war all seem to be included in today’s popular ideation.
Before I ever heard about something called the World Wide Web, I had already been burying stuff for about 15 years and I had never lost anything that I put in the ground. One common myth on the Internet is that it’s illegal to bury, hoard or cache survival gear and valuables. This is a complete falsehood since churches, youth groups and schools do it all the time; only they call their caches “Time Capsules.” In addition, the term “geocaching” is a term that defines what’s described as a popular outdoor activity in which participants play a high-tech game of hide-and-seek.
Since the day I first discovered the Internet, I’ve also seen much chatter about how burying stuff is such a waste of time and about how easily the government can swoop in with it’s superior technology and locate everything in the blink of an eye. But in reality, I can remember several instances during my life where a small plane like a Piper or a Cessna disappeared over the American or Canadian Rockies. Despite massive search and rescue operations, a few of these small aircraft have never been found; and these crash sites were ABOVE ground.
The fantasy is that the government knows all and sees all. Using the population of the United States as an example, no government has the ability to constantly monitor 320 million people all at once, (although it certainly does try) nor does it have the resources to scan every inch of U.S. soil. And if no government is capable of finding a buried stash, then neither are thieves, hackers, delinquents, drug addicts or looters. Even the most massive illegal drug farms are either discovered by human intelligence or accidentally stumbled upon by local law enforcement officers investigating an unrelated crime; not located by superior government technology as many would believe.
To this day, there are many “treasures” (safes and even entire bank vaults are still missing from heists; millions of dollars in cash and gold bullion from stagecoach robberies, etc) lost in the old American West that have been buried for more than 100 years and have yet to be discovered.
Simply put; Burying is the ultimate security. Period.

How to bury your stuff; 5 Methods

How To Bury: 5 Methods

to Guarantee the Safety of Your Valuables

Because no one can take what they cannot find
Here are 5 methods that myself and other survivalists have been using successfully for many years. They can be used by themselves, but since multiple redundancies are best, they can also be used in any combination that you desire. I’ll start with the cheapest first and progress to the most expensive, but you should be aware that money invested has no bearing on the integrity of your cache. If constructed properly, each of these is just as reliable as the other.

The Bell Method

The Bell Method is something that I thought up and named when I was about 12 years old. The concept works on the simple truth that water cannot run uphill and in 30 years of digging, this is the least expensive way I’ve ever found that can guarantee 100% that your gear or valuables stay dry. If you are on a budget, then use the Bell Method. It’s based on the fact that you can take an empty drinking glass, turn it upside down (like a hanging bell) and push it down into a bucket of water. Anything attached to the inside of the bottom of the glass will remain perfectly dry.
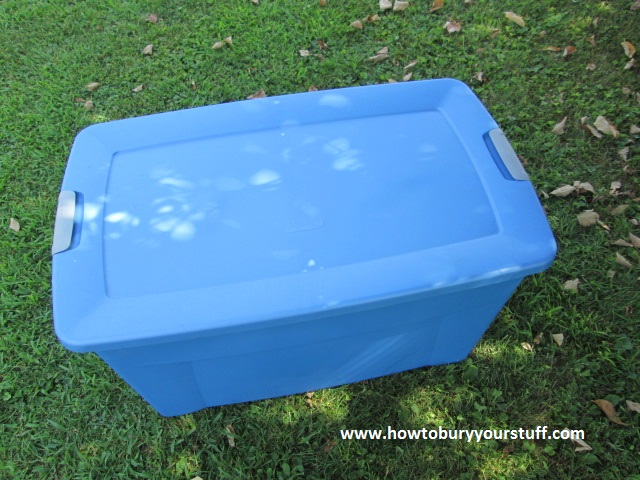
A hanging bell is represented by any upside down container that is constructed out of a single piece of plastic, aluminum or galvanized steel. Any size or shape Tupperware container or plastic storage tote should work just fine. Choose your container and another container big enough to hold the first.
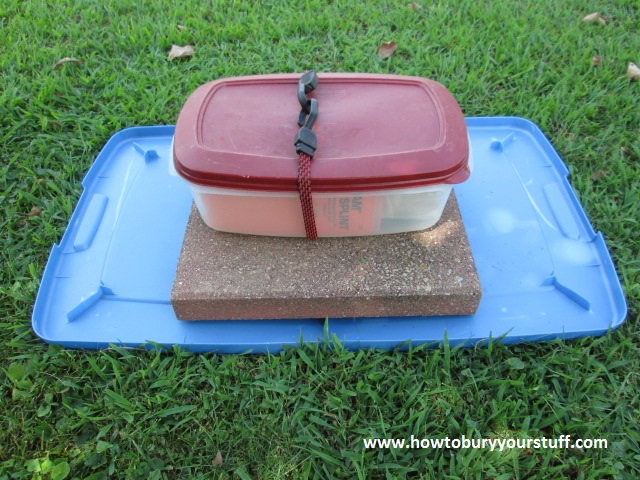
03 tote, emptyDig a hole in the ground appropriately sized for the larger of the two containers, as the larger container will be used to make the bell. Make sure to measure your depth to allow for your area’s frost line and the height of the container. As you can see by the photo below, lay the lid in the hole and weight it with rocks or bricks.
The primary purpose of these rocks or bricks will be to keep your smaller container up towards the bottom of the upside-down larger container (the top of the bell) and out of the water. The Bell Method includes these rocks or bricks through the assumption that your bell may not be perfectly level and perpendicular to the pull of gravity. Even if you use a leveling tool, changing temperatures can shift, pivot or move your bell causing it to lose it’s perfect level. The rocks or bricks allow for some water to enter the bottom of your bell and hold your precious valuables up out of the water. In the example given in the photograph, the second Tupperware container would float toward the top of the bell in the event that water entered the cache.
03 tote lid, brickAlso note that should a torrential downpour of rain literally saturate the ground, the air bubble inside the bell will create a very powerful positive buoyancy. It is critical that you bury your container deep enough that the weight of the soil is heavy enough to hold it down; if you must bury this shallow then I recommend placing rocks or bricks on top of the bell for added weight.
I would not normally use a storage tote of this size; only doing so as an example for this website. If the bell is not deep enough (6 inches or so) and not heavy enough, it can actually bob to the surface by slowly breaking through a thin layer of soil; so bury it deep; at least 18 inches for larger containers; but use common sense when deciding on depth versus the strength of your bell. For example, if you are burying at a depth of 5 or 6 feet, a Tupperware storage tote like this one will most certainly collapse from the weight of that much dirt. Consider using a plastic drum or buying a pickup truck’s fuel tank from a junkyard.
I’ve had people in New Jersey, Missouri and Tennessee inform me that their underground bells had only been slightly dislodged after as many as 8 years underground; and that their precious cargo was in perfect condition, just as it was the day that they buried it.
On my ‘Tips and Tricks page’ I show several containers that can be found around the house or in the garage that make excellent Bell Method candidates.

Surplus Ammo Can

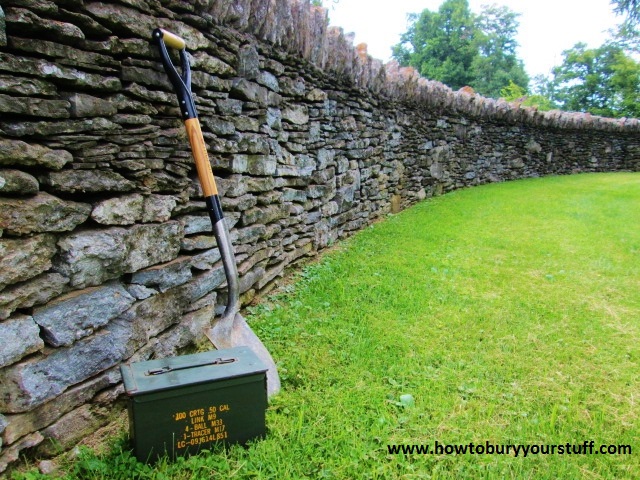
Surplus military ammo cans are the best! They are not as cheap as they once were but are still very affordable. The ease of opening and closing the can is the greatest thing about them. You don’t need silicone, grease or epoxy to seal them and you don’t need tools to get one open. Just pop it open and pop it closed.
Don’t purchase the new plastic kind and don’t buy a used one that is rusted or severely dented. The original issue “old school” metal ones from the Vietnam era are the best. When buying surplus ammo cans, inspect the rubber seal on the lid. Ensure that this gasket is intact with no damage or dry-rot and you’re in business.
One cool thing about metal ammo cans is that they function as excellent EMP shields or Faraday Boxes. They are in fact, specifically designed to shield ammunition and AP mine detonators from EMP while on the battlefield. Any electronic devices placed inside the closed box and NOT touching the metal body of the can will be protected against electromagnetic surge of any kind.
I use ammo cans when I’m burying from depths ranging from 3-5ft deep or when I’m burying for long periods of time. There’s not much else to say about them. They are inexpensive, tough and will more than likely remain watertight long after we are all dead and buried ourselves.

PVC Pipe

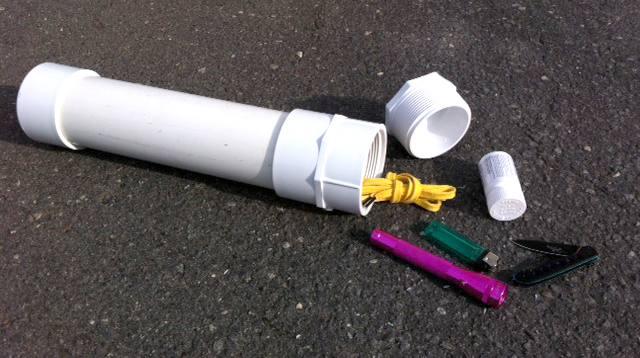
This is a popular method used by preppers and survivalists worldwide. Buy a piece of 6” PVC conduit or sewer pipe and some rubber endcaps. You’ll also want some epoxy resin and some wheel bearing grease or Vaseline.
Cut the pipe to fit whatever you are burying and allow yourself a little extra length; better to be too long than too short. Personally, I use epoxy resin to permanently seal one end with a rubber endcap. After loading my valuables, I use grease or Vaseline to seal the other end, the “door.” I then mark each end and out of sheer habit, I bury the section of pipe with the permanently sealed end slightly uphill of the door. This is probably unnecessary, just a habit of mine. In this photo, they used threaded endcaps.

03 pvc pipe cacheIf you are planning on leaving your cache unattended for more than 5 years, it won’t hurt to spray paint the entire thing with a good enamel or cover it with a plastic sheet. I do this to prevent dry-rot on the endcaps and once again, this practice is also probably unnecessary and just another one of my paranoid quirks.
Don’t forget to stick a screwdriver in a Zip-Loc baggie and bury it with your PVC pipe. Amusingly enough, I can personally attest that without a screwdriver, a knife or a dime, they are frustratingly impossible to get open.

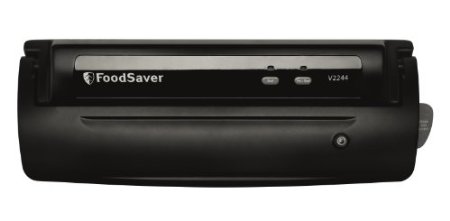
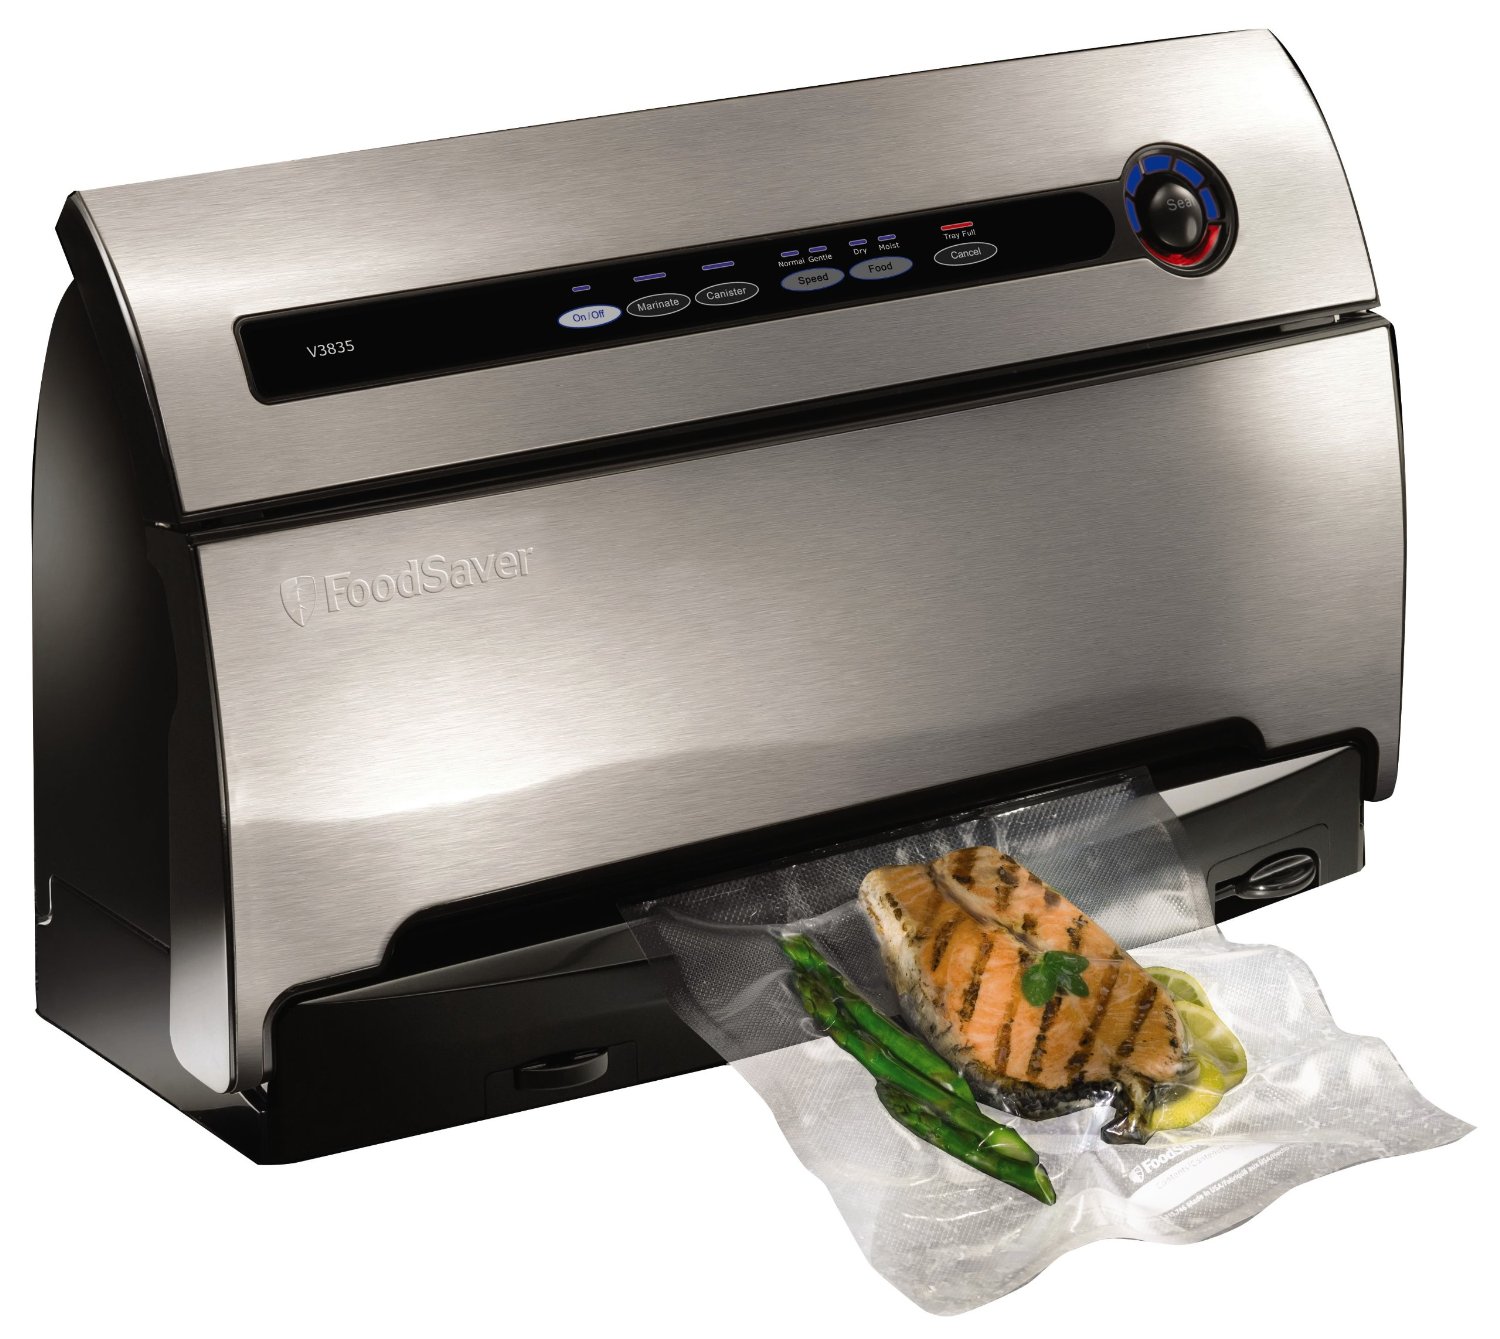
The FoodSaver Vacuum

These vacuum machines usually run from $80 to $200 and use plastic bags that are designed to prevent or postpone freezer burn in frozen foods. These things are not cheap, however you will find they are quite useful in the kitchen, and they really do seal permanently. Here’s the cool thing though, you can use them for anything at all; if it will fit in the bag, it will seal it.
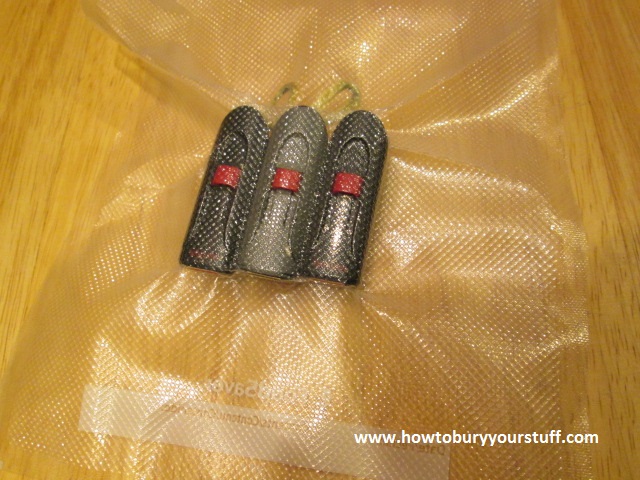
You can dump in whatever you want. Handfuls of bullets, USB flashdrives or even paper products like a ledger, diary or photographs, then simply seal the bag. I’ve included another photo and my only advice about this method would be to try to use desiccant if possible.

flashdrives.foodsaver.no.desPelican cases

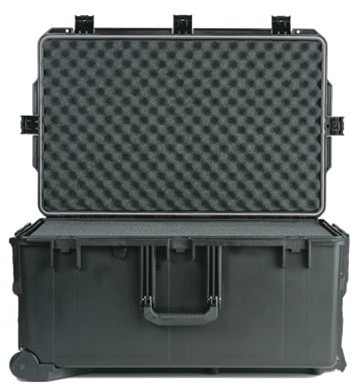
Pelican Products was founded in the 1970′s.  They make versatile and superior waterproof cases worthy of respect; and they are also priced accordingly. Sorry, but if you want “the best” then you’ll have to pay for it.
Pelican makes a variety of cases in different sizes and shapes that come guaranteed and under warranty. You can buy a case fitted for your external hard drive or for your favorite rifle. They make specialized and general purpose containers in almost any size you could possibly desire.

Guide to surplus military issue ammo cans

Guide to Military Surplus Ammo Cans

Because no one can take what they cannot find
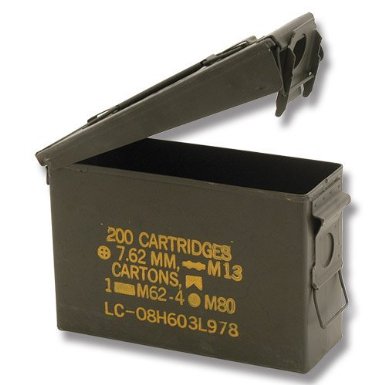
One of the most popular methods of caching underground is using military surplus ammo containers. On this page, I’ll be talking about the “old-school” Vietnam-era 5.56mm, 30 caliber, 50 caliber and 20mm ammunition canisters made out of steel. They are rectangular shaped, constructed as a one-piece box with a hinged, removable top with a locking clasp and a handle.
There is one very good reason why these steel ammo cans are popular with survivalists and preppers; and that’s quite simply because they work. They have a rubber seal around the lid and provided that you don’t get one with a bad seal, it won’t leak … ever. For what it’s worth, I’ve messed with dozens of these things over the years and I’ve never even seen one with a bad seal. I always instruct people to check this gasket when purchasing a military surplus ammo can; but even if you buy one with a bad seal, all you would need to do is run a bead of all-purpose silicone over the cracked or dry-rotted seal before closing it. The only time I’ve ever told someone to scrap one was because it was dented so badly that the box itself was deformed. Ensure that the lid closes properly and you’re “good-to-go.” An easy way to check for sure? Dunk the closed can as deep as you can in a swimming pool or stream for about 10 minutes; the whole time shaking and turning it underwater, then check for water on the inside.

Another big plus is the ease of opening and closing, you don’t need tools to open or close them. Just pop the clasp and poof! you’re done, no screwdrivers or grease. Another added benefit is that they are already camouflaged, almost always painted in the traditional olive-drab matte green that is truly difficult to spot in the brush. The paint is tough and although they will eventually rust, you can take comfort in the fact that military-grade ammo cans take a very, very long time to rust all the way through.
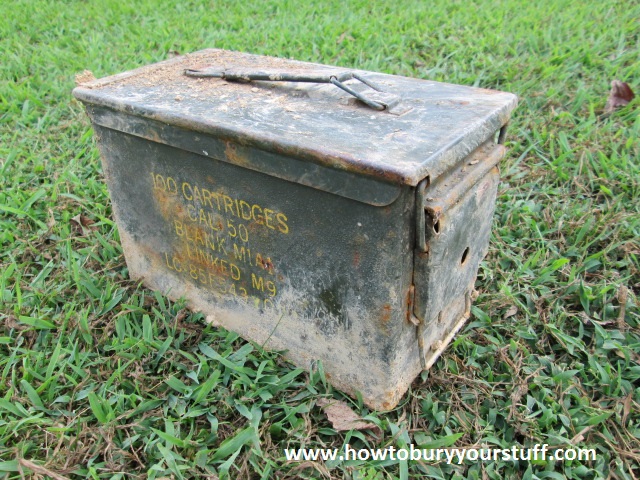
Military Surplus Ammo CanThe above photograph shows a 50 caliber box that was recently excavated after being undisturbed 24 inches underground for 4 years. A friend of mine used it to store a Sig model 229 with 300 rounds of Federal 40 caliber JHP. He didn’t use desiccant and since the gun was undamaged and the bullets fired just fine, I’ll assume that this is a “good” can and show you how to restore it. The little bit of surface rust that you can observe in the photo is perfectly normal and nothing to worry about, there is only slight pitting in the metal and my friend could’ve left the ammo can underground for another 4 years with nothing to worry about.
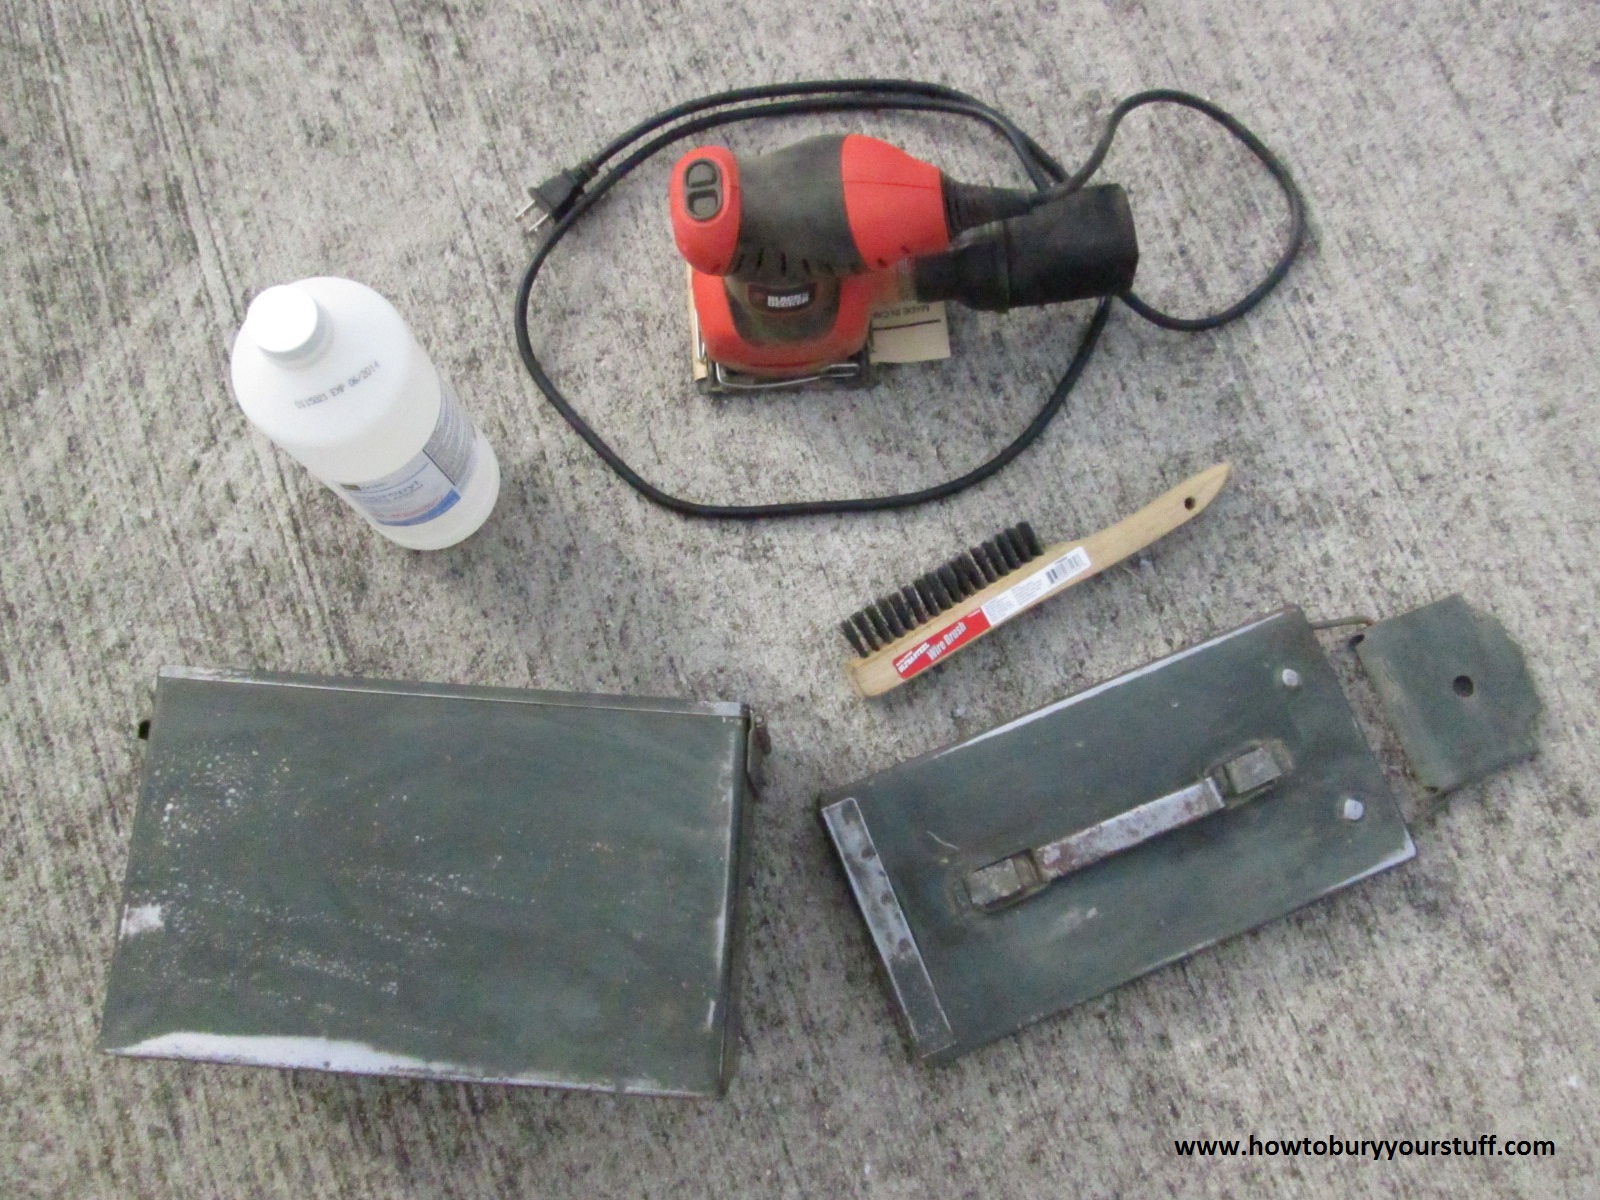
Although I mentioned that a little rust won’t hurt, I’m more than a bit “meticulous” when it comes to caching. My friend replaced this box with a newer one, reburied his Sig and gave me this ammo can; and I want it in the absolute best possible condition should I decide to use it. So here we go … you’re gonna want a wire brush (the longer the bristles, the better) some sandpaper and some isopropyl alcohol.
Remove the lid from the box and scrape all the outside surfaces. You will want to use the wire brush to dig as deep as possible into any pits or crevices. Sandpaper is fine for the flat surfaces as long as you remove as much rust as possible from each and every part of the box and lid. When you’re done, use the rubbing alcohol and a couple of clean rags to remove every bit of dirt, dust and grit.
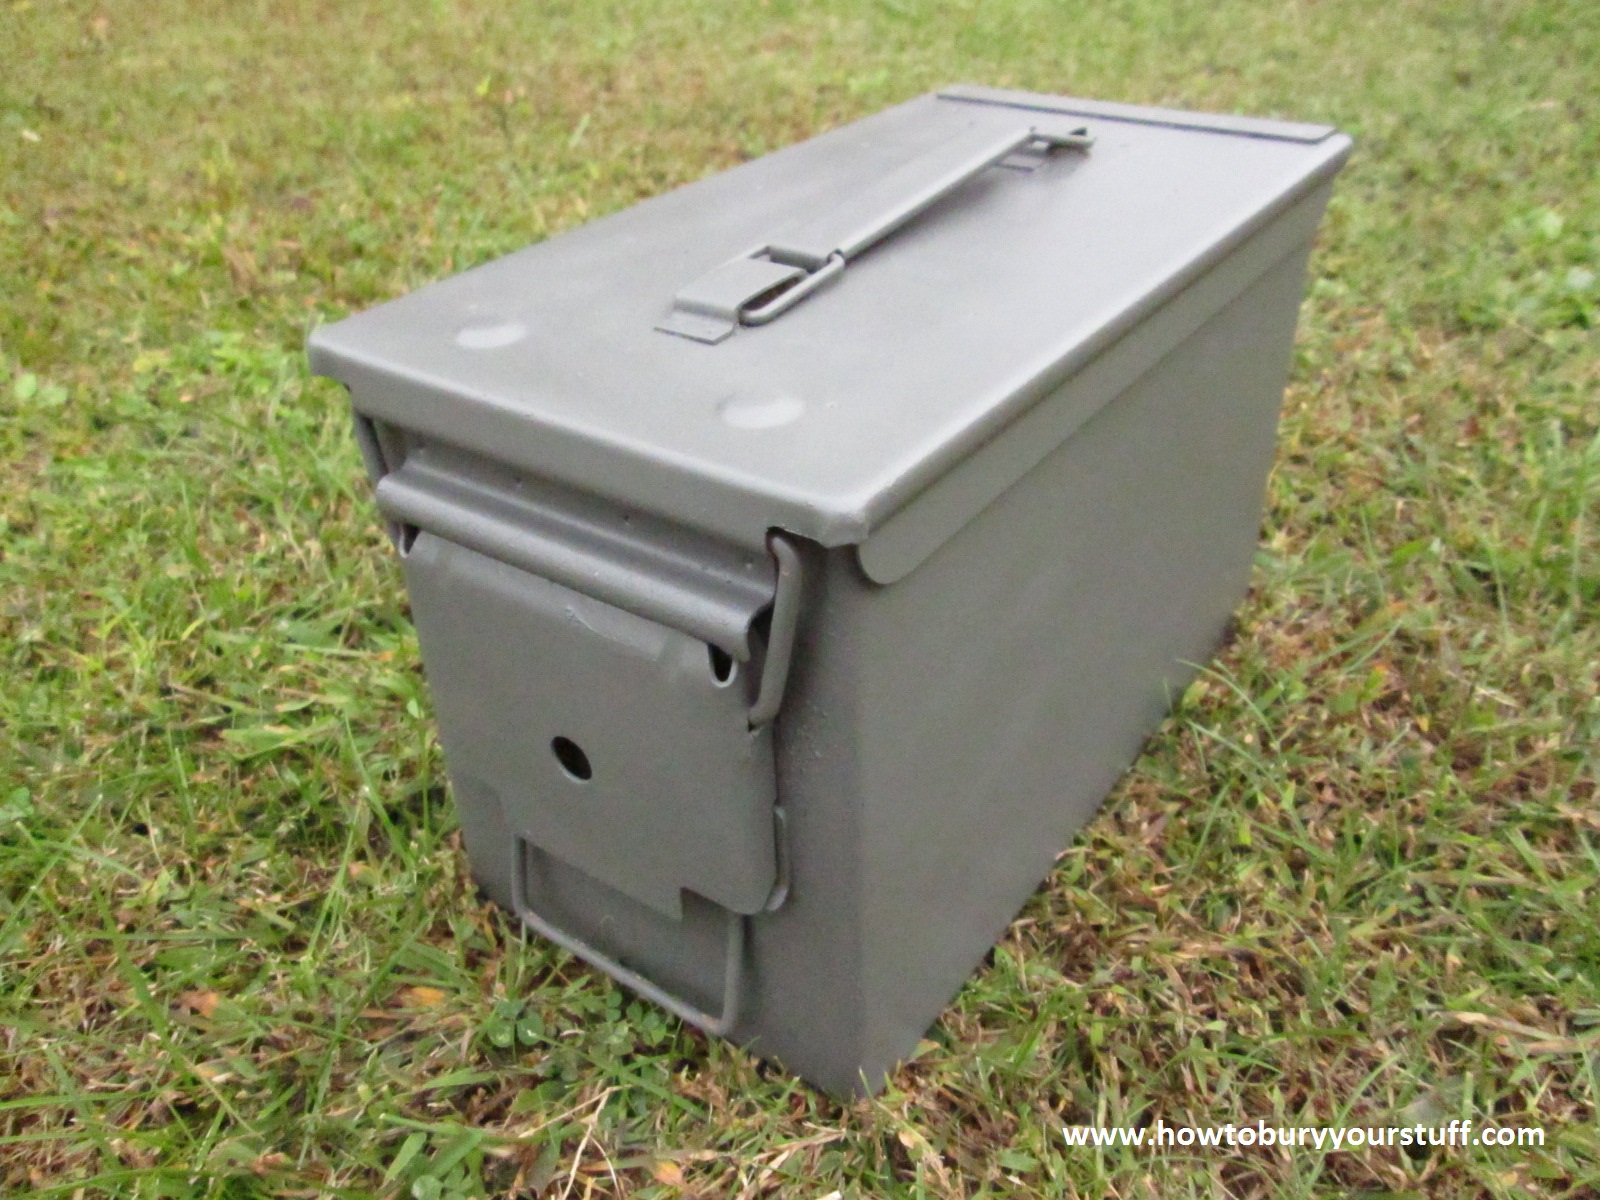
Military Surplus Ammo CanAfter you’ve successfully cleaned your ammo can, you’ll want to paint it. Spray primer on it first if you want, but in my experience the spray paint primers don’t stick any better than the paint itself. For this ammo box, I picked out a can of Rust-Oleum textured enamel in flat pewter. I can’t tell you how many coats of paint I sprayed but I used more than half the can of paint.
I put a couple extra coats of paint on the bottom of the box and all the way around the bottom about an inch up all four sides. If you’ll scroll back up to the first photograph of this box, you’ll see an extra layer of caked-up mud and rust along the bottom of the ammo can. This is the result of a plastic “bell” that my friend used when he cached it four years ago. I’ll explain in more detail shortly.
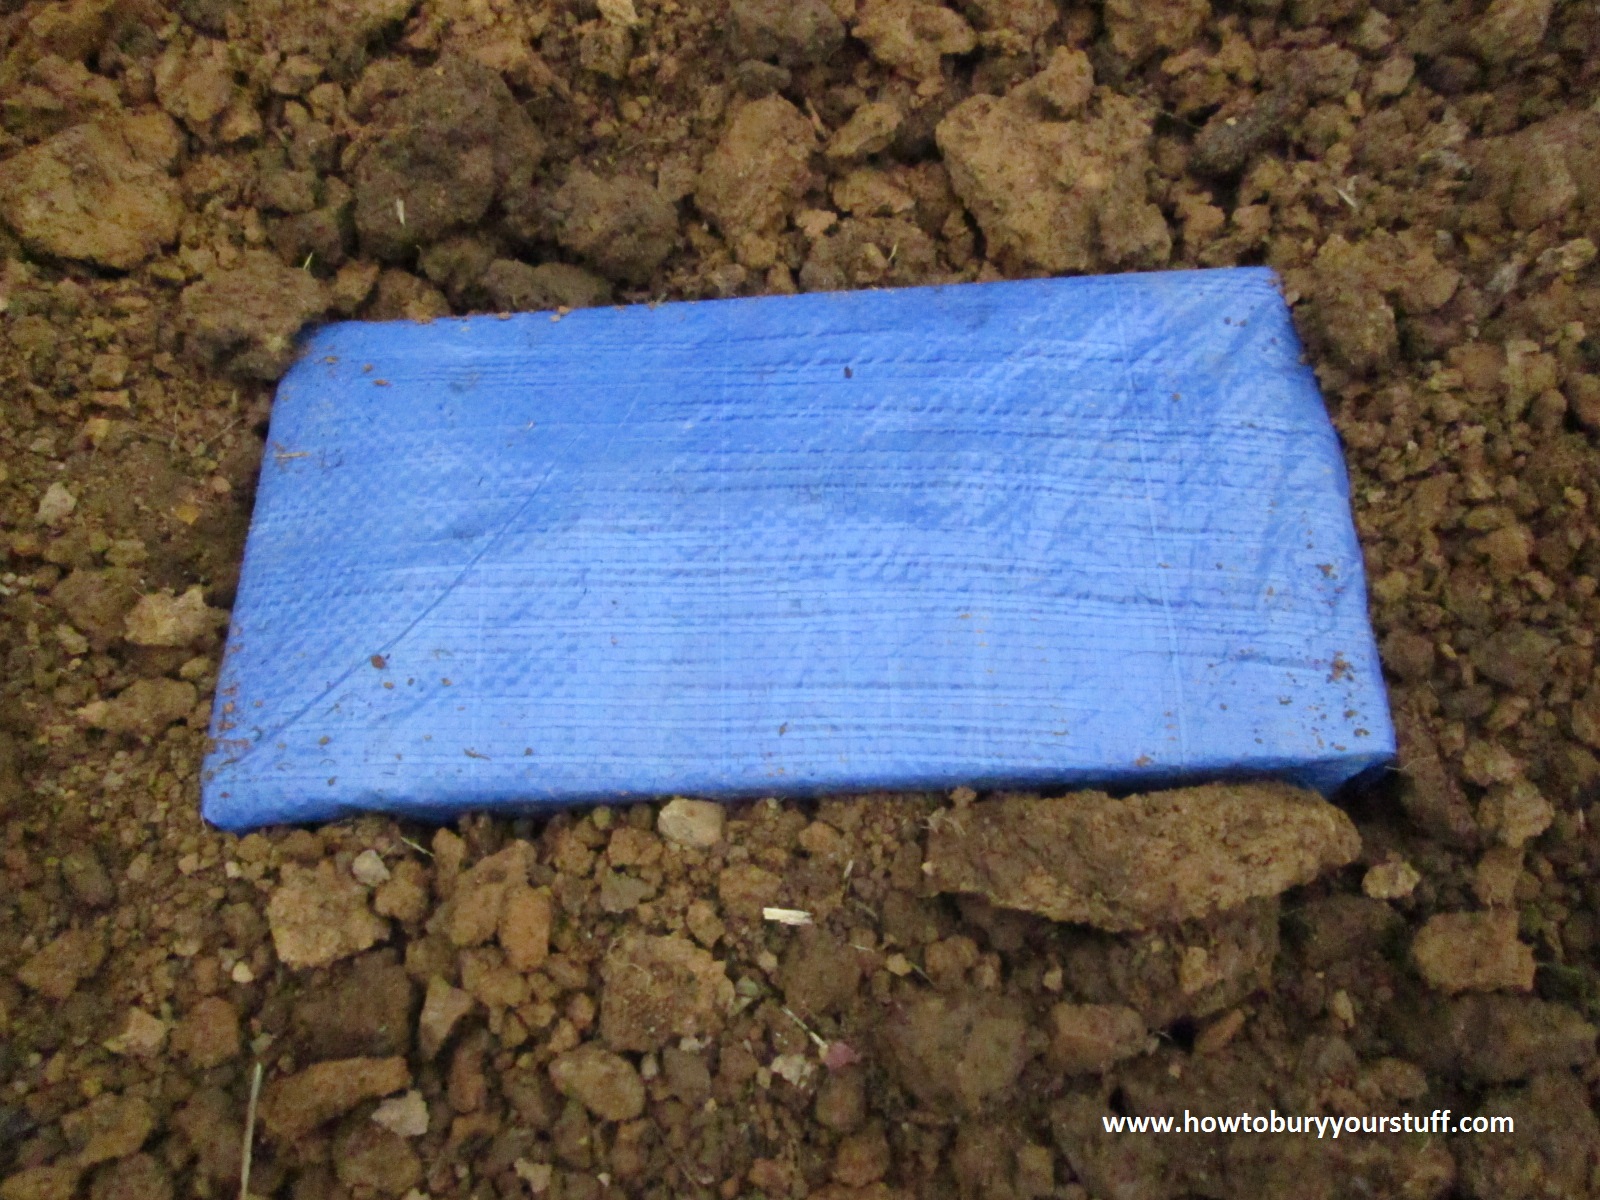
Military Surplus Ammo CanWell here’s my finished product. I removed as much rust as was possible, thoroughly cleaned it and I feel pretty confident about the paint job. My next step was to rummage through the garage and find a tarpaulin; the tarp itself is in good condition except most of the grommets are ripped out. I laid my freshly painted ammo can upside-down in the middle of the tarp and cut a rectangular section out of the tarp.
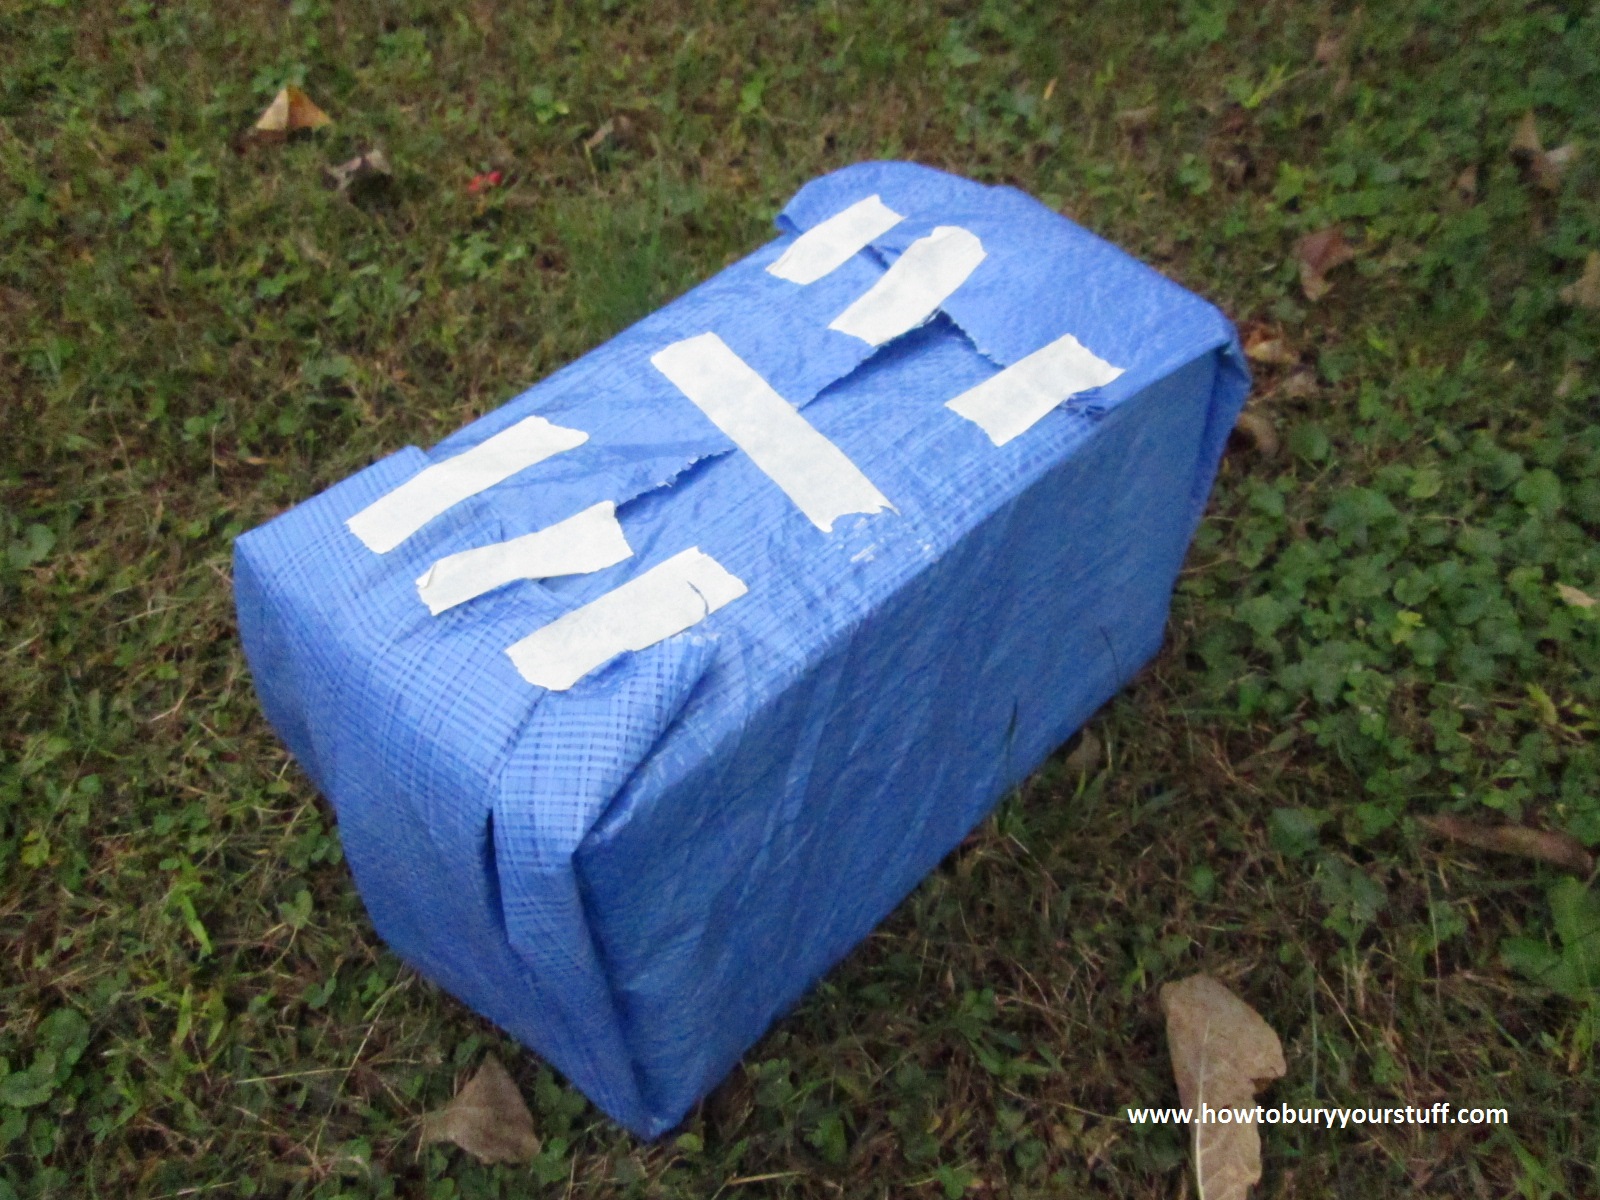
The rectangular section is trimmed down so as to allow me to wrap the ammo can in such a way as to create a bell shaped cover for the box; leaving only the bottom of the box open. If you haven’t read it yet, I recommend my web page entitled “How to Bury; 5 Methods” as it explains my Bell Method a little more thoroughly.
Military Surplus Ammo CanPlease take note that in this photo, the ammo can is upside-down and the masking tape that you see is on the bottom of the box. I’ve already cut a second rectangular section (identical in size to the first) out of the tarp and wrapped it in the exact same manner (with the tape on the bottom of the box); making a two-layered bell to keep the ammo can dry. Note that I’ve wrapped it so that the only openings in the tarps are on the bottom of the box.
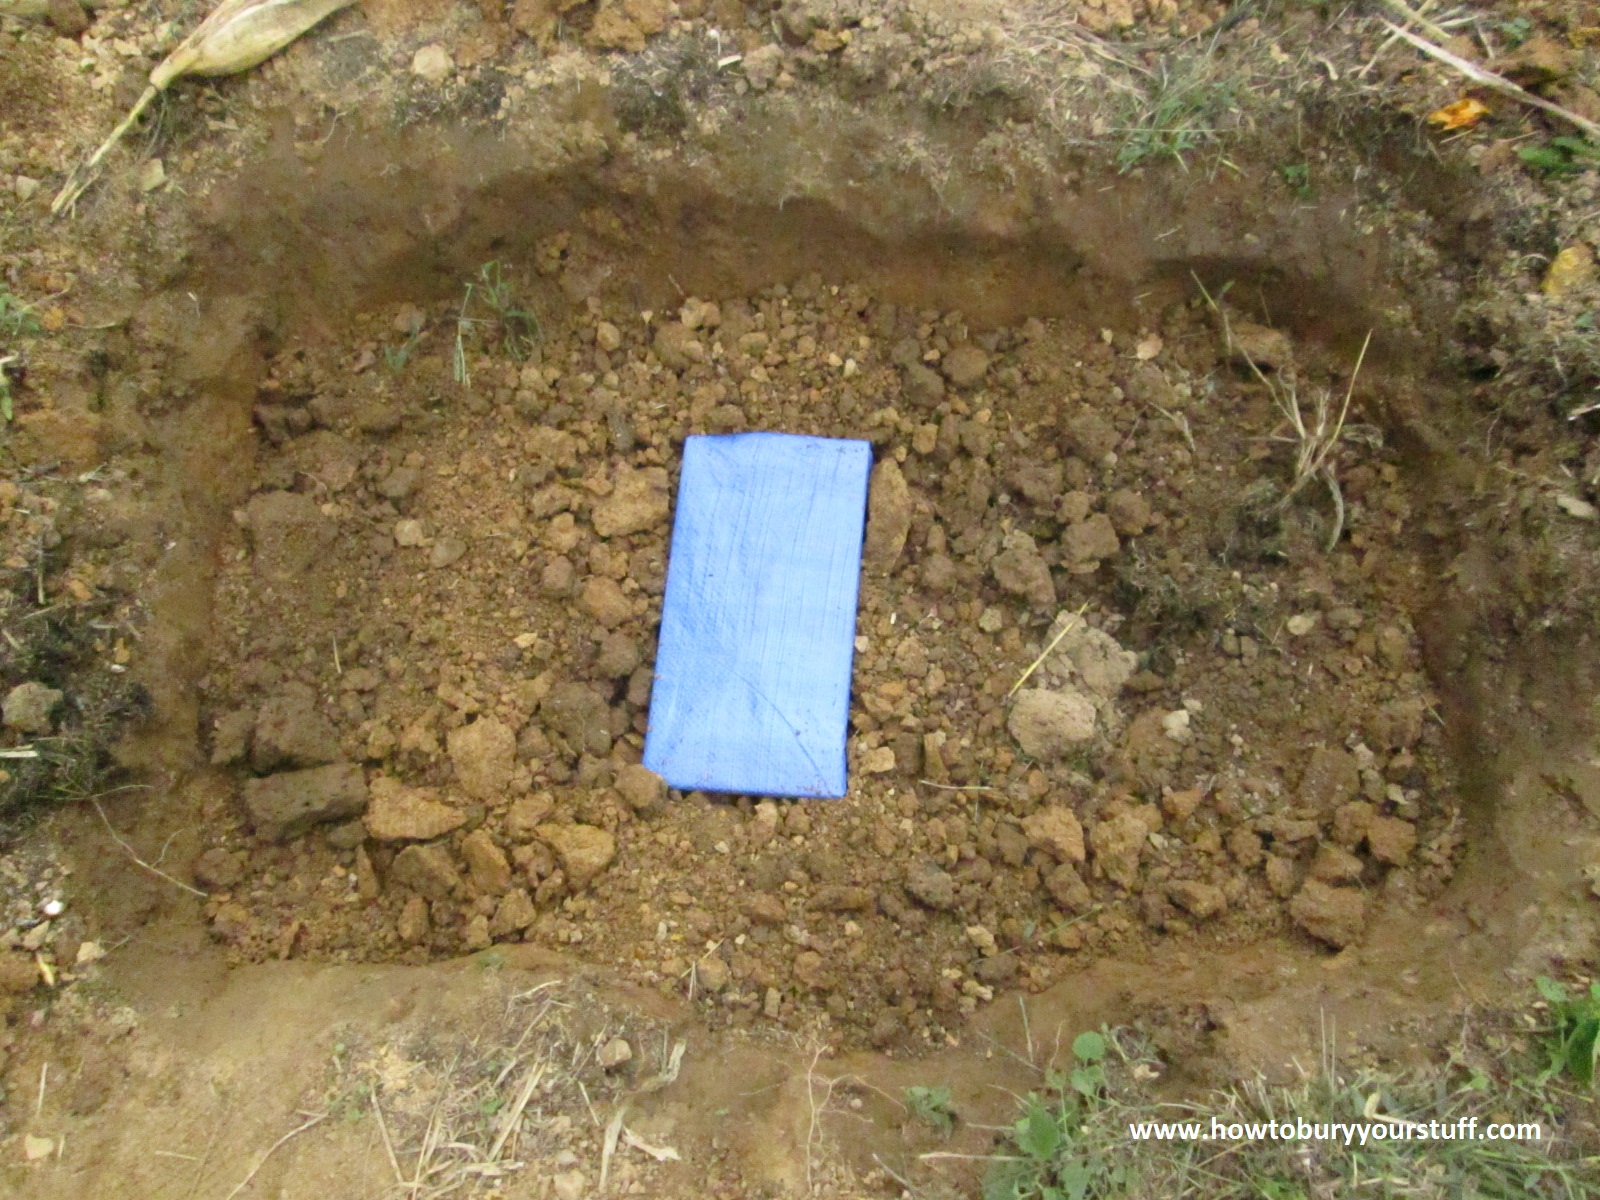
When you bury your surplus ammo can “right-side-up,” the openings in the tarp with the masking tape will be on the bottom. The weight of the soil will keep the tarps in place and since it’s impossible for water to flow uphill, your ammo can will stay dry until the tarps rot enough to leak. In my experience, two layers of a typical tarp like this one from Wal-Mart, should keep most of your box dry for the first 1-4 years. (depending on climate, annual rainfall and depth)
Military Surplus Ammo CanMy friend used garbage bags when he cached his Sig four years ago and they rotted quickly; this is why you can clearly see a ring of rust and mud around the bottom of the ammo can in the first pic. This is also why I put extra coats of paint on the bottom, because the bottom of the box will get a little wetter. An alternative would be to use an upside-down Tupperware container or a junked vehicle’s fuel tank as a bell but that means more work by digging a bigger hole.
I might also note that making a “bell” to keep your ammo can dry is only for long term storage and might be a little extreme. A lot of preppers don’t cover their military surplus ammo cans with anything; they just drop them in a hole and cover with dirt. There’s nothing wrong with this method. As I mentioned before, these cans are water-tight and they take many years to rust. Just off-hand as I’m typing this, I can’t ever remember hearing about anyone losing anything that they put in them.
Military Surplus Ammo CanHere’s what it would look like going in the ground. I’m not actually burying this can so you’ll have to imagine caching it a little deeper. In this photo, the top of the ammo can is about 8 inches below the surface. I just dug this hole as a demonstration, I would triple that depth to about 24 inches if this cache was staying in the ground. The frost line here is 15 inches but that varies, you’d have to research the frost line for your location.
That’s just about everything you need to know about military-grade surplus ammunition canisters. Don’t be afraid to buy one that’s a little beat-up; if it’s got a little rust or a few small dents that’s perfectly normal. Every ammo can that I’ve ever used or seen anyone else use looked just like the first photo on this page and it’s just hard to go wrong with them.
You can use these cans to safely bury anything that will fit inside them; handguns, hard drives, ammunition or valuable documents. I recommend them to everyone because they are affordable, quick and because they do their job quite well.

Tricks and Tips for caching

Tricks and Tips for Caching

Because no one can take what they cannot find
I’ve put together this webpage to share a few little tricks that I’ve learned over the years. It’s a little haphazard and disorganized but I’m hopeful that this page might save you some time, money or frustration.
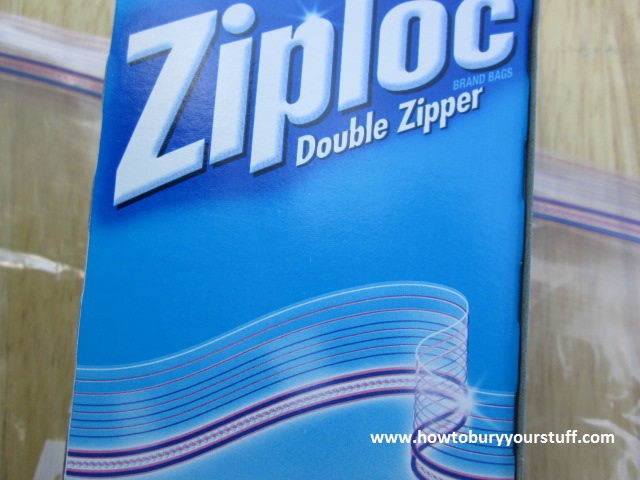
Don’t underestimate good old-fashioned Zip-Loc brand (not generic or any other brand but ZIP-LOC brand double-zipper) baggies in either quart or gallon size. These things are great; cheap and totally watertight.
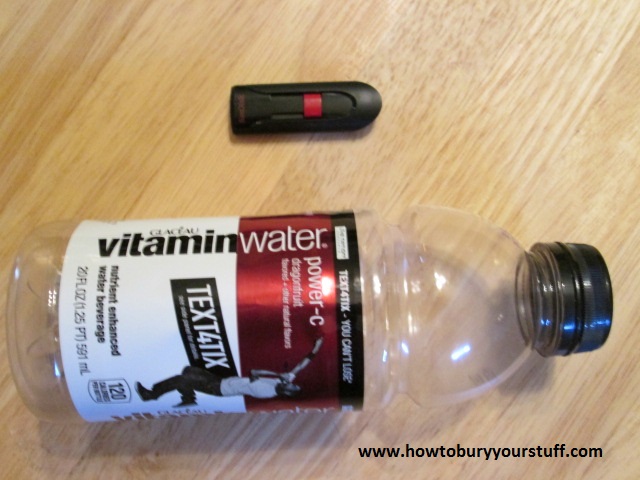
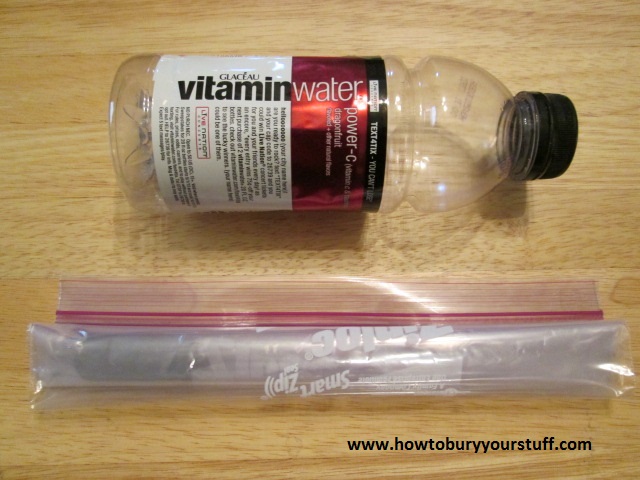
10 ziploc.doublezipJust burying a single flashdrive or a few pieces of jewelry? Use the simplest version of my Bell Method. Take a Vitamin Water bottle like this one that I found in the corner of my garage.
10 bottle and flashdriveDrop your flashdrive into a Zip-Loc baggie, seal it and then drop that baggie into another one. Leave just enough air so that the flashdrive would float and slip it into the bottle.
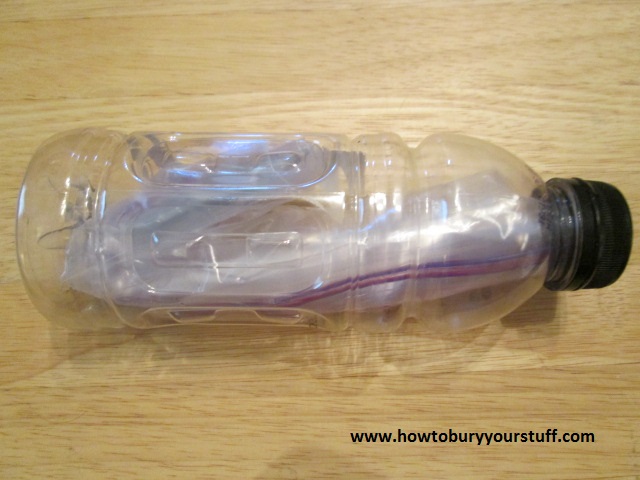
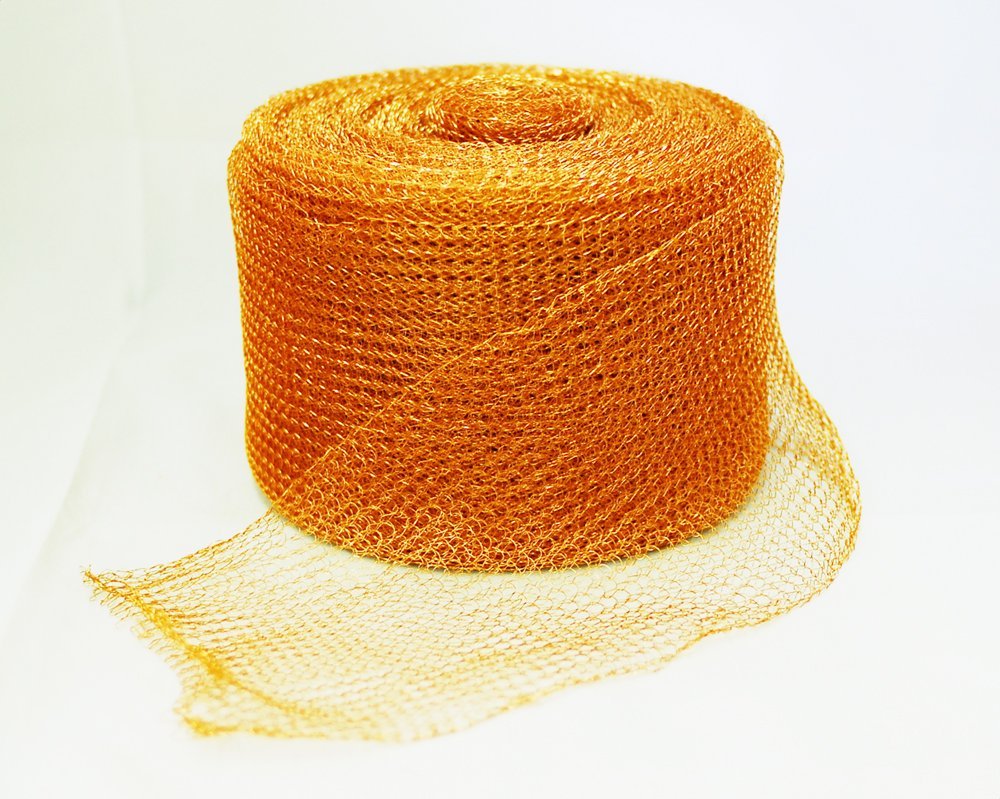
10 bottle, flashdrive, two ziplocsScrew the cap on firmly, bury the bottle upside down and boom! Just like that, you’ll have a cache that will last remain secure for many years. A bottle this size should be good-to-go for a depth of no more than 24 inches, any deeper and the weight of the dirt could crush it. Be sure to bury it upside down so if the cap does leak, water still won’t get in. Need to shield it from EMP?…just wrap it in aluminum foil or copper mesh; FYI the copper mesh is best since it’s the better conductor. Total cost is probably less than 5 bucks, it requires no tools and it will protect your flashdrive for many years.
10 bottle, flashdrive completeYou can see by the last photo, that the flashdrive itself is lodged near the bottom of the bottle. This is ideal since the Vitamin Water bottler will be upside-down, placing the usb drive near the top of the bell.
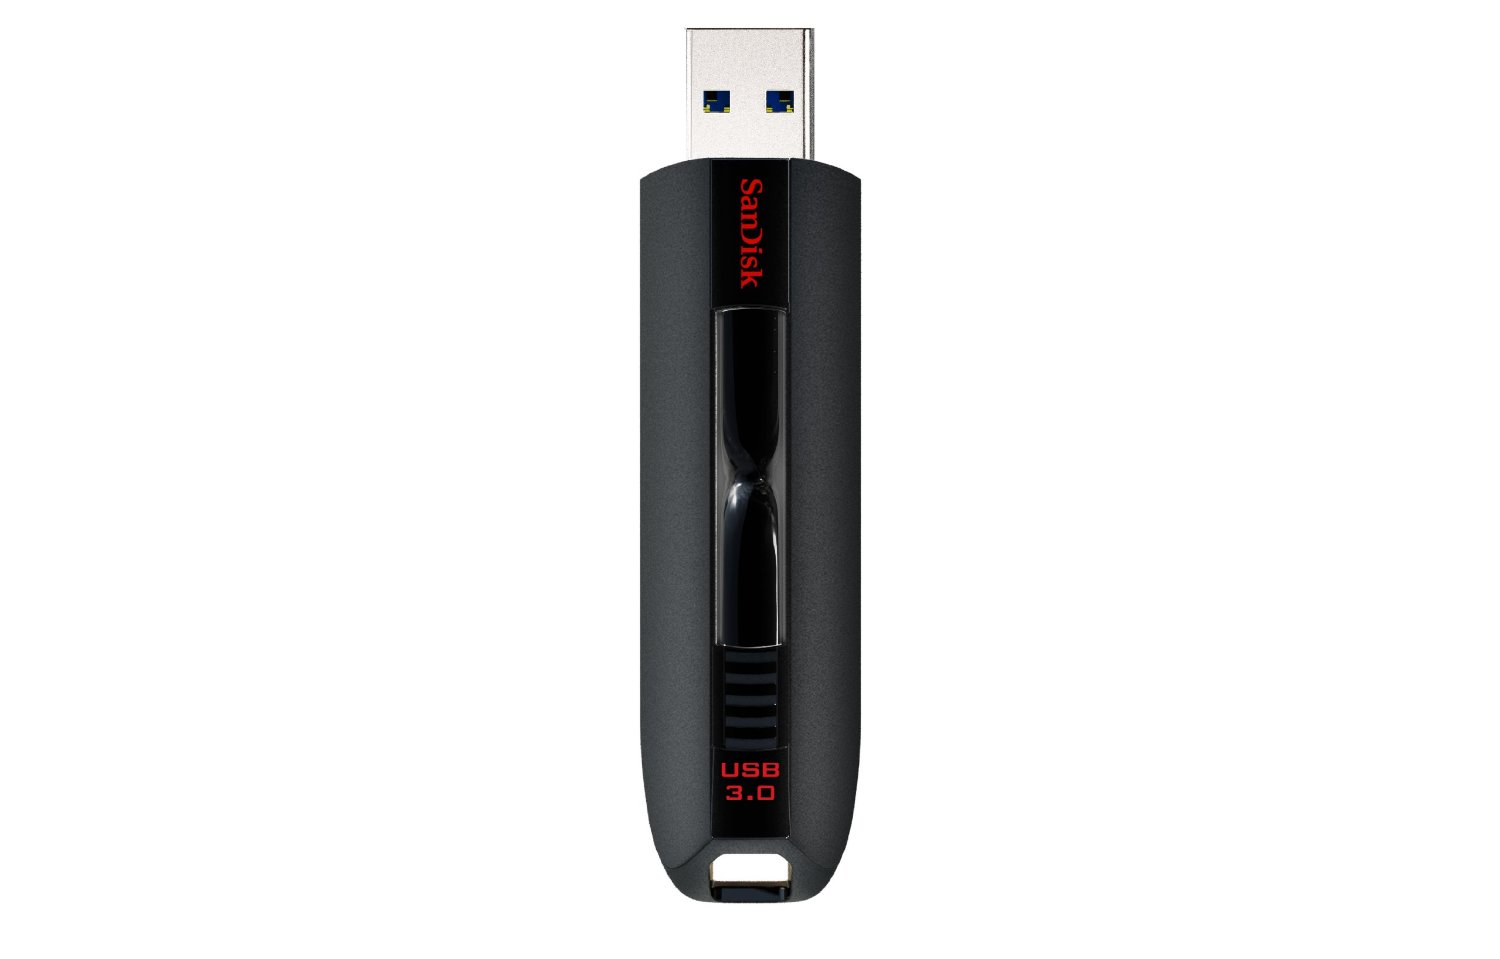
SanDisk makes a model called the “Extreme” and it has solid reviews for both reliability and durability.

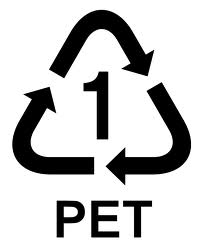
When using plastic drinking bottles to cache your valuables underground, do NOT use clouded plastic containers like milk jugs. Liquids like milk and motor oil are usually bottled in HDPE marked as #2 on the SPI recycling label. This label is located on the bottom of every plastic container; it has 3 arrows in the shape of a triangle and usually says, “Please recycle.” Drinking containers and small bottles made from HDPE plastics will crack, split and break apart very quickly (within a year). Stick with clear plastics; PET/PETE or #1 on the SPI recycling label…
10 spi recycle code…and remember that this rule applies only to drinking containers like milk jugs. I believe most 5-gallon buckets are HDPE or #2 on the SPI recycling label and I’ve used plenty of them over the years; when using Tupperware or Rubbermaid type products, look for a #5 on the SPI label.
If you are looking to safeguard important photographs or documents, just bury them in your yard for convenience. Remove any staples or paper clips and use only plastics to cache them. Without any metals present, they would be virtually invisible to most technology. You could actually tell your neighbors that you had valuable documents buried in your garden or flower bed; and anything short of ground penetrating radar would be useless in locating them.
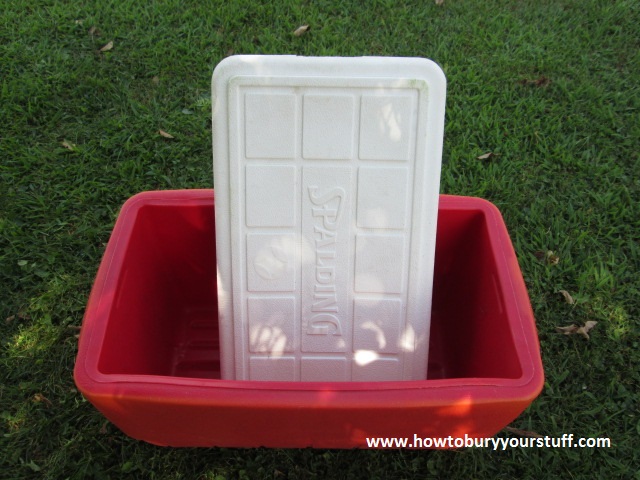
I rummaged through my garage today and found several items worth mentioning. I found an old cooler with a lid and it’s just perfect for depths of up to about 3 or 4 feet.
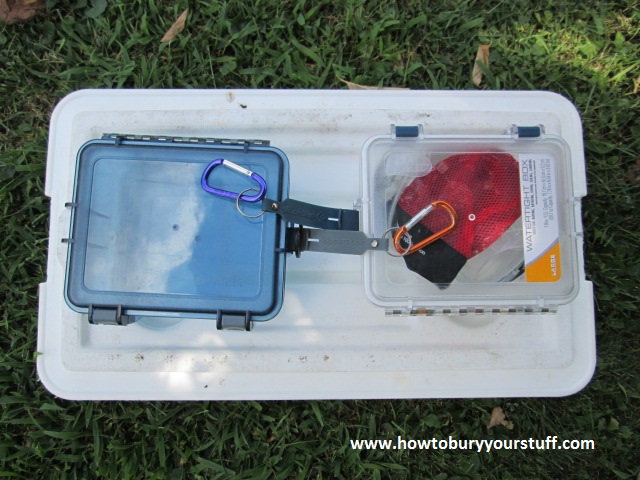
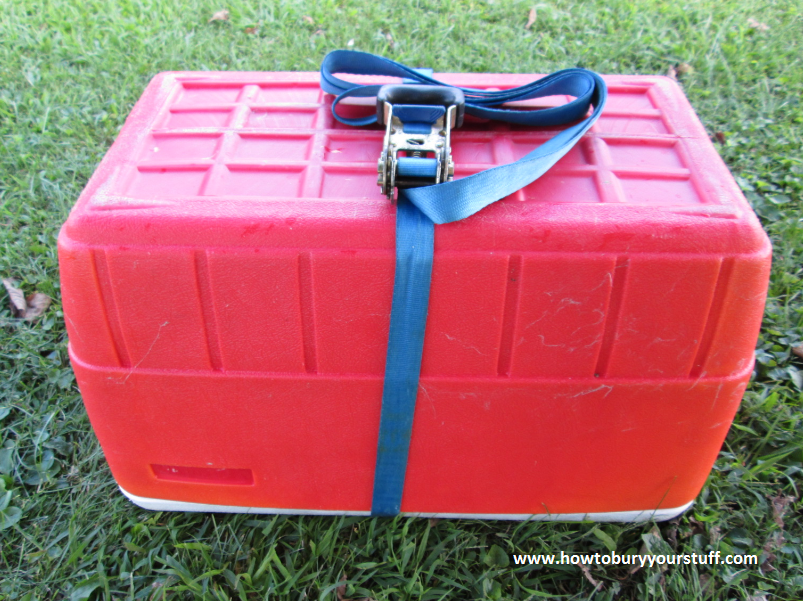
10 coolerBury it upside-down and make sure you bury it with the lid. Without the lid, the weight of overhead soil will slowly push it deeper, displacing precious air. Place your valuables in waterproof containers on the lid of the cooler. If the cooler does not remain level, it won’t matter at all because any water entering along the bottom will just make these two Outdoor Products dry boxes float.
10 cooler lid
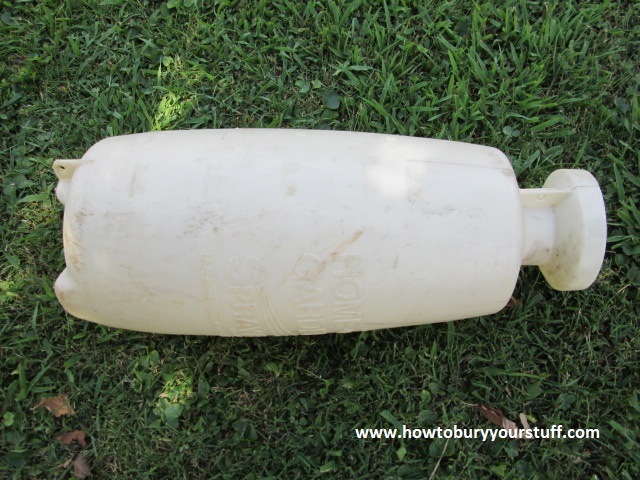
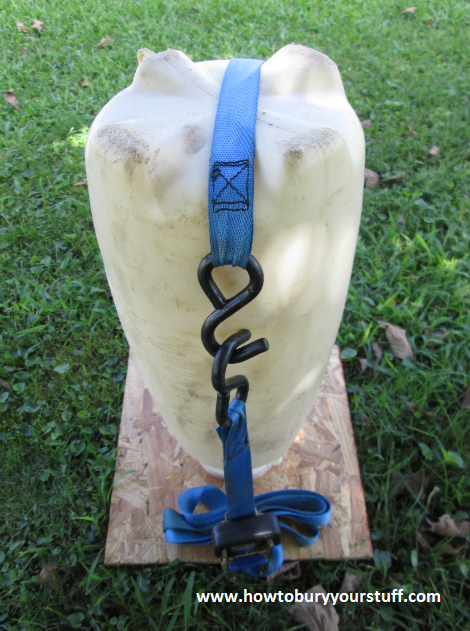
10 cooler, packedI also found an old garden spray bottle with a broken nozzle. Instead of throwing it away, one could roll up documents, jewelry or flashdrives in Zip-Loc’s and bury it upside-down using my Bell Method.
10 sprayerSet it on a piece of wood to prevent dirt from being pushed up inside. Garden sprayers like these are long lasting and very tough. I’m just guessing, but it could probably withstand depths deeper than most of us care to dig. Just as I did with the cooler, I used a ratchet strap to secure the package as one piece. You can count on a quality ratchet strap lasting about three years underground.
10 sprayer on osbAlways remember that just as in everything else in life, creativity counts; some preppers get creative and use tire nozzles to purge their PVC pipe caches with nitrogen and leave 3-5lbs PSI of pressure inside the tube. Without oxygen, nothing can rust or oxidize; and with constant internal pressure, you are guaranteed not to have any water leaking in.
This may sound paranoid, but watch your air cover. There are more eyes in the sky than we realize and all of the precautions in the world won’t matter a bit if there is a photo of you on Google Maps digging a hole in a field :)

Helpful links and other Resources

Helpful Links and Other Resources

Because no one can take what they cannot find
My first personal goal while constructing this website was to acknowledge that I am not the only person skilled when it comes to ditching stuff underground. There are several other very good references currently available and a few of them have some experience with aspects of underground caching that I do not. With that in mind, I thought that I would share a few helpful links.
One of my favorite websites is SurvivalistBoards.com and they have a survival forum loaded with threads about burying stuff underground. You can simply search their archives with the keywords “burying underground” and you’ll get several very good discussions with some great advice about geocaching weapons, food etc. This website also has a repository of downloadable PDF’s about survival and prepping. It’s a friendly and supportive group of people and one of the largest survival forums that I’ve seen.
Survival Cache has an excellent article about a wonderful little invention called the “MonoVault.” Since I personally have no experience with this caching strongbox, I thought that I would provide the link here – The MonoVault has a strong reputation and comes in at least three different sizes. It is not cheap, but like I mentioned earlier about Pelican, if you want the best you have to pay for it. Even if you never buy a MonoVault, you should still read this article. You’ll find it surprisingly informative and well-written; in my humble opinion it’s probably the best piece of literature about caching underground.
I may be mistaken, but it’s my understanding that among survivalists and preppers, a man named Jim Rawles stands out above the rest. He writes a blog where he personally covers just about every subject that one might envision. He wrote a piece a few years back about permanent caches… click here to read it …about which I do have some knowledge and experience but certainly not as much as Mr Rawles. I may add a webpage later about bigger projects but even if I do, I would still recommend this link. It’s a detailed and informative article written by someone with first-hand knowledge and many years experience.
A post by someone with the username JeepHammer once caught my attention. It’s located at PreparedSociety.com and it caught my eye because it was intelligently written and also because apparently I’m not the only person to think of turning caches upside-down. JeepHammer gives some great advice about waterproofing and locating a caching spot. He also has some helpful tips for camouflage and operational security.
If you are burying firearms then you’ll want to check out Great Northern Prepper …as I’ve not yet gone into great detail about guns and ammo. I do plan on adding a step-by-step tutorial about burying guns and ammo yet I would still recommend reading this blog post. The Great Northern Prepper covers pre-purchase aspects and mentions PVC pipe and the MonoVault; an excellent and informative article.
I decided that a website dedicated to underground caching would be incomplete without mentioning this book. Google search TC-31-29A, it’s the U.S. Army’s technical manual for caching and it’s available for download on dozens of sites. One word of caution; this manual has a section on a method called submersion. This usually involves diving underwater, tying your cache to a moor and using specialized packaging/containers. Extreme caution should be taken when employing this method of caching. Use common sense when considering both water currents during flooding and activities by the general public; like fishing, that may cause the discovery of your cache or interfere with your ability to retrieve your cache.

Thursday, November 14, 2013

Prepping 101: A Complete Guide for new Preppers

How do you make a plan? One step at a time. Reading this is your first step. The next ones will guide you through the process of putting down on paper, or in the computer, those things you will need to do to get to the state of preparedness you want.

Some assumptions that I think are reasonable that should be taken into consideration when you make your plans:

• The overwhelming majority of preps will be needed for situations that occur at home.

• Most disasters will not be Doomsday, The Apocalypse, TEOTWAWKI or WROL situations.

• Most disasters will still have police and National Guard units enforcing law & order.

• People will still be responsible for their actions legally and morally.

• There will looters and violence in some major disasters, but the proportion of life & death incidents will be much smaller than the number of incidents requiring basic human needs.

• Most households will have some basic items at home that can be used during a disaster. Not everything has to be purchased for use only during one. You can often incorporate into the preps items you already have. (Basic first aid kits including some OTC & any needed prescription meds. A flashlight or two & some candles. A knife. Bedding)


The actual plan:

1. Threat Analysis:
Sit down with your loved ones and have a discussion about the current situation and what fears and concerns everyone has. No one can prepare for everything, especially in the beginning. Make note of what the things brought up in the conversation. Don’t need to scare anyone, and it could be difficult to get them to admit to any fears, especially the younger ones. But it is important to include them, because not everything you will want to prepare for is life and death.

Forget about Doomsday Preps, Armageddon, or TEOTWAWKI for now. Keep it real. Do the best you can to decide what reasons you would bug-out as opposed to bugging-in. Bugging-in is the much preferred action, but there are very good reasons to bug-out. Consider what would drive you from your home, based on your location and situation.

2. Prioritize:
Once you know the things you want to prepare for, put them in a general groups of what you want to start with, what can wait a while, and what should be put on the back burner for the moment. Trying to do everything at once is likely to overwhelm and discourage everyone. You don’t want that. A steady progress to each goal you set will get the job done. And I will suggest a couple of goals right off the bat. One is learning and getting all the training you can. Classroom, internet, and book as well as hands on. The other is part of the first. Begin acquiring a good library of prepping books and magazines to read and learn from as part of your educational program, as well as storing them for future use.

3. Goals:
And keep things goal oriented. Set the goals, realistic ones. Goals that can be achieved. Leave the pie in the sky super deluxe bunkers and Mad Max vehicles to the fiction writers. You want something that you can achieve, on a timely basis. Set the level of preparedness you want for the first group of priorities. Once you know where you are going, you can start getting ready to get there. Set some general achievement goals on a timeline to get started. And remember that goals should be realistic to start with, but can be adjusted as things change, you learn more, or things happen that call for a change in the plan.

4. Budget:
This is an extremely important part of the process. A budget is a good idea for all financial matters, but is even more so when trying to get ready for things that might just happen before you are ready for them. You will need to spend some money. But you can’t let other things go, either. Still have to pay the mortgage or rent, the auto loan, and on and on. Get them in the budget. Everything you must pay on a weekly, monthly, quarterly, or yearly basis.

Don’t forget taxes, and the unexpected. And don’t give up everything you like to do. You still need to live a life, especially with a family. Once you have a household budget, you can determine how much you can spend on preps for given timelines. Then you start doing a separate budget, using those numbers, to get the things done you need to do.

Before you put many numbers in, you are going to have to decide on the items you want first, but get the budget set up, and keep it flexible. It will change over time. Once you have a reasonable budget lined out, add the timeframe and amount for the long lead items that you plan to purchase and start saving a budgeted amount per month for that item/those items.

5. Start Prepping
Once the basic plan is in place and the budgets set up, start prepping.


Prepping 101
The best place to start is usually getting the basic human needs taken care of first, no matter what scenario you are preparing for. First you need to figure out what those are, but that is pretty easy. I have a list. The rest can come when you have learned more and not only have, but have practiced with, the initial items. Begin to study and learn all you can now, and as you go along. Preps without knowledge aren’t nearly as effective as they are when you know the why-to and when-to in addition to the how-to. Do not feel like you must do everything in the order listed. You will need to do many of the things, especially these first ones, concurrently. Some things can wait, depending on your specific situation, but the basic human needs should all be met as quickly and completely as possible.

1. Air:
Fortunately, it is still free and available, for the most part, for most scenarios. If there is a problem with air supply, special equipment and supplies are necessary. Not a beginner’s subject.

2. Water:
Has to be contaminate free, naturally or with other means. And a lot of it. Store a lot, locate a reliable future source, get water treatment/purification. A few 15-gallon water drums, a couple of stainless steel water bottles with cups for the BOBs, a quality water purifier, either a high cap camping filter or a combination of a drip filter for the BIB and a smaller hikers filter for the BOBs. Scout out locations for long term supplies of water.

3. Food:
You can go for a while without it, but not long or you become useless. No cook, add hot water only, & easy-cook shelf stable foods, heavy on meats, fruits, and comfort foods. For both BOB and BIB. Buy in bulk or in case lots when possible. At the least, buy extra of the things you want and use on a daily basis when they are on sale. To build up longer term supplies, double buy each grocery day. Soon you will have a good pantry.

Learn to garden and grow as much as you can as soon as you can. Ditto home canning when you get the garden going. Don't be afraid of the commercially produced crops like wheat and oats. You can grow non-hybrid/organic types in a home garden.

4. Sanitation:
You gotta go when you gotto go. You need the safe means to do so. Chemical toilet, TP, hand washing means, bug spray, antiseptic cleaners, shovel to bury wastes. Toiletries. Charmin camper’s toilet paper and cleansing wipes for the BOBs. Infectious diseases protection supplies, face mask, gloves, goggles and hand sanitizer. And the ladies, and especially soon to be ladies, need large supplies of their needs on hand.

5. Environmental protection:
You need appropriate clothing as well as housing. Sometimes it is more important than food or sanitation in extreme circumstances. This includes being able to make and control fires. The right clothes for the season. Basic camping gear in case the house becomes unlivable.

You are probably already doing the right clothes for the given season, though here in Reno I see people going from heated homes to heated cars, to heated business and back again wearing a T-shirt, shorts, and flip-flops in 20 degree weather with snow on the ground and coming down hard (I am not joking). Have what you need to keep you comfortable in the weather.

And the camp gear is for when the house cannot be lived in and you need to camp out in the back yard or evacuate. Or even stay in the house when nothing is working. Fallout/blast shelters, like air purification, are another specific topic that deserves separate consideration. Put it in the budget, and start saving, but don’t short the other equipment and supplies unless war is imminent.

6. Security:
Beside protection from the elements, there can be a need for protection from dangerous animals, including other humans. Light is your friend. If you cannot see the threat, you cannot protect yourself from it. Lights and vision devices are an important part of a security plan, as well as all around useful. Once you know you can see it, you can get the actual means to protect yourself from those things in your threat analysis you decided were the biggest dangers. From wild domesticated animals, wild animals, and self-defense in those cases where it might be needed. Training, weapons, defensive measures. For some this is a much higher priority. Evaluate your needs and make the decision.

They tend to be expensive, so set up a long range budget and start saving money for them now, even if you can’t get it yet due to the overall expense. But as soon as you can, get something that is at least reasonably effective, even if you prefer something else in the future. Don’t put it off protection items to get the penultimate weapons system. Train, train, and train some more with them. And don’t forget operational security. Be very careful who you let know you have preps. There can be repercussions if other people do know.

7. Fire/Lighting/Sharps:
These are important for safety and utility. You will want several means to start a fire, and a couple of items to contain fire. Fire steel, Lifeboat matches, lighters with some tinder for the BOBs. To heat one room in the house, an indoor safe propane or kerosene heater with a supply of fuel stored outdoors.

You will need lighting for indoors & outdoors. A couple of crank flashlights for both BIB and BOB, candles, propane lanterns, battery lanterns. Tactical lights for defense. Get some lighting specifically for preps, even though you probably already have a couple of flashlights with weak batteries and non-working bulbs.

You will need sharps to cut with. Knives/SAK/Multi-tool, axe, saw, etc. I’m fairly sure you have a knife or two in the house. Probably suitable for most uses, except lacking a sheath. But there are some blades that are better for field use and Swiss Army Knives (SAKs), and multi-tools can be handy, and if you need to build shelter or an outdoor fire, axes and saws will save you much labor.

8. Heat/cooling/Cooking:
There quite probably will be a need to maintain acceptable temperatures in home and in the field such as indoor safe propane and kerosene heaters. Gas grill w/tanks, various camping stoves for home or field to cook food when possible (but not in the house). No-cook, and add-hot-water-only foods are desirable in the early stages of a situation. But a hot drink and hot meal can raise the spirits and supply needed warmth in many situations. Not critical at first in some climate, but nice later on.

Others will need to up this on the priority list if in a cold climate and suitable clothes for the weather won’t be available. This could include a generator in addition to non-electrical means so a refrigerator, freezer, AC, stove, medical equipment, fans, etc. can be operated.

9. Medical:
Maintaining everyone’s good health should be a priority all the time. But in some of the scenarios you probably came up with include medical emergencies. Knowledge and the right tools are literally life and death in some instances. Extensive first-aid kits, heavy on the trauma treatment for at the scene and in both BIBs & BOBs and the rest of the alphabet.

These are supplemental kits to your regular home first aid kit. It’s is fine for minor cuts, abrasions, stings, and bruises. In a disaster the injuries are likely to be not only worse, but in great numbers. Stock up with quality in mind and with as much quantity as is possible. Another item to budget early on to get a bit later. And get some training.
Make sure to rotate items that have expiration dates. You can use some of the outdated items in training exercises. Dispose of over the counter medication and any sharps safely.
A note on prescription medications. Unlike OTC meds, prescriptions medications are limited to how much that can be obtained and stored. Some things, like narcotics, are limited to a single 30-day prescription. Other prescriptions can often be written for a 90 day supply. Work with your doctor to get as large of a supply of your prescription medication as you can get and can afford.

10. Morale/Welfare/Recreation:
If you need to be using preps, that means there is a lot of stress involved. The means to help relieve that stress can be very important. Games, some small toys and some paper and pencils, religious books, movies, books. Something to keep the kids quiet and busy, adults entertained or comforted, or just to break the monotony.

There are many more things on the list, but the first ten are the most important, in most circumstances. If your threat analysis includes certain scenarios, things like HAZMAT preparations climb up into those first ten

Some of the additional needs:

11. Information/communication:
We live in a society. You need to know what is going on around you. Radios can provide that service, though there are a few other ways. A wind up radio with NOAA weather alert (this could easily be the first item you should get if you’re in tornado alley or where coastal hurricanes occur), AM/FM, Short wave & a set of FRS/GRMS or MURS radios works for both BIB & BOB, Amateur Radios for LR comms, Binoculars, maps, compass, GPS, flares/mirror/smoke/whistle.

Forewarned is forearmed. If you know it is coming the better you can deal with it. And if you are lost or separated or trapped, having the means to signal will get you back a lot faster.

12. Transportation:
You may or may not be able to stay where you are, though it is usually the best in many scenarios. But some call for evacuation, often suddenly. Not only vehicular, but alternative means, with a way to carry the gear in addition to the people. A vehicular BOV if possible, Motorcycles, bicycles, animals, on foot.

Since, in my opinion, the majority of disasters do not call for bugging out long distances, if at all, transportation is down here on the list. If you live in a tsunami zone, near an active or soon will probably be active volcano, you might want to up the priority level. And if you have children or pets or both, evacuation on foot is very difficult and calls for some more sophisticated measures.

I consider LBE (Load Bearing Equipment) part of transportation. This is equipment to carry your gear and supplies when in the field. BOB/BIB/GHB/INCH bag/GOOD bag, etc. Packs, travois, game cart, bicycle. I am a proponent of taking more than what you can comfortably carry in a back pack. Especially if you have children. Definitely consider having some type of cart to carry heavier weights than you can on your backs, and give the little ones a chance to get off their feet.

13. Tools/Hardware/Cordage:
Besides fire/lighting/and sharps, you will need tools to fix things with, and some hardware to make the repairs to keep the above items in good repair, available, and useable. To get you out if you’re trapped in, to get in to someone that is trapped. Tools and parts to make and repair items. 100+ feet of 550 cord for the BOBs, plenty of rope of several types for general use.

Not everyone knows how to use many of the specialty tools, or are physically unable to. These are primarily for at the scene of a disaster, but some items can be carried in the evacuation kits for minor things on the road. This also includes fishing equipment/hunting equipment/traps/game prep equipment, wild edibles books and gathering equipment, etc for gathering wild foods.

14. Camping gear:
You may not be able to stay in your home, for a variety of reasons. Having adequate camping gear for the family, whether staying in the back yard or when bugging out, can keep you out of a community shelter and simply make life easier. The gear addresses most of the basic human needs, just in a relative portable package. And much of the gear can be used indoors if need be if the power and other services are out. And if you do need to bug out, in bad weather, the gear can be lifesaving.

15. Important Documents:
Having documentation after a major event can be critical for getting help, or avoiding problems. You will need to have originals or copies of IDs for everyone, contact lists, copies of insurance cards, etc. There are several lists of what you need to have. This is another thing that, though probably doesn’t need to be budgeted for (except to get replacement birth certificates and passports) does need to be planned out and executed over time.

You will be working with agencies of the government and big business with some of them and it just takes time. Start early and finish when you can will hopefully be good enough. It is serious enough for me to remind parents about children’s immunization records. Those could be a big deal.

16. Education & Reference Works:
You are going to need to how to do a lot of different things during and after a major event. Start accumulating as you see books and things on sale. Read over them and then put into good storage. Practice those things that are advantageous for ordinary times. Gardening, home canning, auto repair, and wild food gathering and the list goes on. This is long range planning. If you don’t already know how to hunt and fish, and process wild foods, you might want to work it into your schedule as you get more prepared.

17. Finances:
You will need assets during and after an emergency situation. Cash, gold coins, silver coins, a debit card. This is special disaster related finances, not your everyday household budget, which should already include an emergency fund for every day happenings such as car repairs. The things listed can, in various circumstances, be of great help. Or not. It is all situational. Some will take cash but not PMs, and some will take PMs but not cash, some won’t take either. Try to have something set aside if you have to evacuate.

And then there is barter: After a major event, there may be times when cash or precious metals just won’t do. People will be wanting things. This is quite low priority, compared to most of the other things on this second list, but you might want to stock some items to barter/trade to get things you need. For those that don’t think precious metals or cash will be any good, and to just have when having is better than not having. Don’t tie up junior’s college fund for it, but look at some of the many lists on the forums that address trade and barter.

18. Spares:
Don’t forget spares. Spares for everything that uses consumables plus spare parts for critical items. Once you get ‘things’, it doesn’t end. Some will need routine maintenance, some rotation, and some spare parts and extra consumables such as batteries, bulbs, wicks/mantles, fuels.

19. Special Situation Gear:
There are several situations that might come up, depending on what actually happens in the particular disaster, that the more or less normal preps don’t address. Things like the need to climb or rappel, either in the field or within high-rise buildings. Special medical supply and equipment needs for a member of the family, including pregnancy and birthing gear. Specific wild animal threats in an area. Specific climatic/weather threats in an area.

Some of these special situations require specific plans and gear that should be analyzed and budgeted for, then acquired, especially HAZMAT/CBRNE (Hazardous Materials/Chemical, Biological, Radiological, Nuclear, and Explosive) CBRNE gear. Chemical can include transportation accidents, fires, and chemical weapons. Biological can include the common cold up to epidemics, pandemics, to biological weapons. Radiological can include radiation leaks at nuclear power plants, and “Dirty Bombs”. Nuclear includes all the “Atomic War”, “Nuclear War”, and “Global Thermonuclear War” scenarios that include direct radiation, blast, thermal radiation, fallout, and several more. Explosives are pretty much conventional bombs and pyrotechnical devices, including Molotov cocktails and IEDs.

HAZMAT/CBRNE gear is extremely important if needed, but expensive and requires training. Radiation sensors, Respirator, protective suit, other PPE. Bucket, brush, bleach to decontaminate. The cleansing items you probably already have. The PPE items are very important if needed. As stated above, if you live in an area where you have to think about nuke plants melting down, up the priority and get them in the budget for acquisition as soon as possible.

20. Humanitarian Aid:
This is a tough subject and tied closely with operational security. Should you spend your hard earned dollars on supplies for other people not in your immediate family? Or even your immediate family if they have made the decision to not prep? If you do decide to have things for other people to use, there are risks.

One is that once people know you have supplies, they will want more than you are willing to give. Another is that the authorities could confiscate them. If you do decide to set aside some supplies for others, you must decide how you will get them to the people that need them. One way is to just give the supplies to the people face to face. Might not be a good idea unless they are very close friends and you know they will not be giving out the location of where they got the supplies.

Another is to clandestinely leave the items and hope the right people get them. Another method is to anonymously present them to your local church, soup kitchen, the Salvation Army or other humanitarian agency for distribution.

Yet another consideration, especially if you are giving out the things directly, is do you do the very basics, such as rice and beans, while you are eating canned meats, fruits, and comfort foods? How will people react if they know you are eating better (or have a better situation in many ways) than what you are providing for them? A very difficult situation. You will have to make your own decisions

21. Special Needs:
Don’t forget those with special needs. That includes pets, livestock, babies, the elderly, and the disadvantaged. They have the same basic needs that everyone else does which must be met in ways appropriate to their situation. Special foods, medical needs, special clothing and housing. Evaluate occasionally and then obtain, store, and rotate as necessary items for those in your group that have these special needs.

Once into the process of following the budget and the plan is underway, continue to re-evaluate everything on a regular basis. You might need to adjust the budget based on less income, or even higher income, or situations might change that require a change in plans. Prepping isn’t static. You aren’t ever ‘done’. It is a continuing process, just as everything else in life is. Keep it in the back of your mind at all times, and your chances of surviving even some very desperate situations are much higher than the norm.

As much as I'd like to take credit for writing this most informative masterpiece, I'm afraid that I can't. If you found this helpful or just want more reading like this, check out www.survivalistboards.com