My Personal Cache – A Step-by-Step Guide
How to Bury Your Stuff: The Ultimate Step-by-Step Guide
Because no one can take what they cannot findFor this demonstration, I’m going to be copying my laptop’s files onto an external hard drive. I will then cache this hard drive at another location, but first I will be photographing the steps I am taking in order to show you the proper way to shield your electronics and digital devices from both condensation and electro-magnetic pulse.
In this photo, you can see my silver Seagate 1tb Backup Plus HDD.
 This
Seagate HDD model has moving parts that may not withstand long-term
exposure to moisture and extreme temperatures; so while burying this
particular hard-drive, it will be critical that I dig below the
frost-line. When burying digital storage devices, it’s preferable to use
an SSD (solid-state drive) whenever possible; they are expensive but
also incredibly tough and able to handle many times the abuse.
This
Seagate HDD model has moving parts that may not withstand long-term
exposure to moisture and extreme temperatures; so while burying this
particular hard-drive, it will be critical that I dig below the
frost-line. When burying digital storage devices, it’s preferable to use
an SSD (solid-state drive) whenever possible; they are expensive but
also incredibly tough and able to handle many times the abuse. I have already saved my laptop’s important files (music, photos, vacation videos and a couple of my favorite films) to the HDD and then placed it inside a FoodSaver vacuum bag with two bags of desiccant.
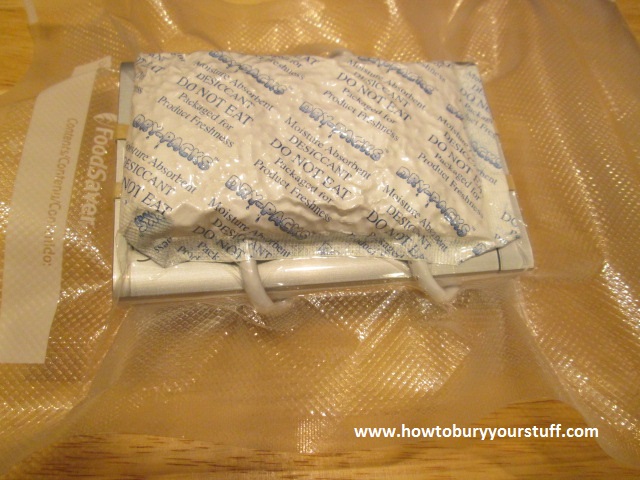 I
then wrapped the FoodSaver bag with a cotton t-shirt for temperature
insulation and placed the wrapped HDD inside an Outdoor Products brand
dry box. These little things are great for water-sports, however after
about 3 years the seals will start to dry-rot. So if you’re caching for
several years, use all-purpose silicone around the seal. If you prefer,
substitute a small Tupperware container in place of the dry box. You
will still need to use all-purpose silicone to seal the lid and I would
wrap it with half a roll of tightly-bound electrical tape for insurance.
I
then wrapped the FoodSaver bag with a cotton t-shirt for temperature
insulation and placed the wrapped HDD inside an Outdoor Products brand
dry box. These little things are great for water-sports, however after
about 3 years the seals will start to dry-rot. So if you’re caching for
several years, use all-purpose silicone around the seal. If you prefer,
substitute a small Tupperware container in place of the dry box. You
will still need to use all-purpose silicone to seal the lid and I would
wrap it with half a roll of tightly-bound electrical tape for insurance.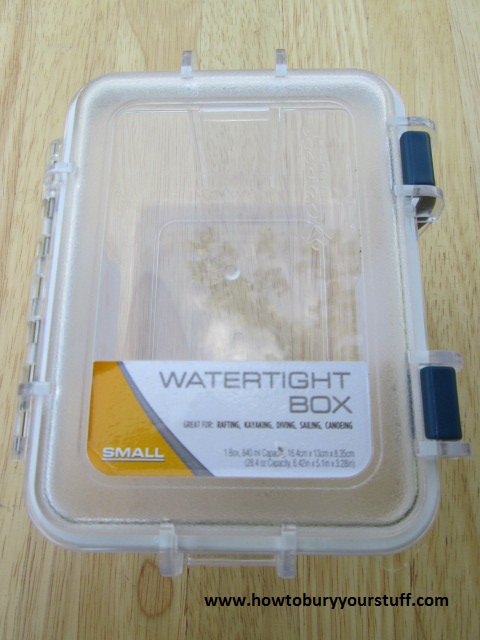
As you can see in the photo below, the two boxes and the styrofoam noodle “spacers” will only take up about two-thirds the length of the pipe. The remaining space will be used for a few more personal items; I’ll leave it to your imagination what they might be.
 I
have taken both of my Outdoor Product dry boxes and placed them inside a
section of 6-inch PVC sewer pipe. I’ve used epoxy resin to seal one end
and petroleum jelly to seal the other; using a permanent marker to
designate which end of the pipe can be opened and which cannot.
I
have taken both of my Outdoor Product dry boxes and placed them inside a
section of 6-inch PVC sewer pipe. I’ve used epoxy resin to seal one end
and petroleum jelly to seal the other; using a permanent marker to
designate which end of the pipe can be opened and which cannot. The
“dead air” space inside the pipe acts as a second layer of insulation
against rapidly changing temperatures and the pipe itself acts as a
second water-proofing device. Since the pipe and endcaps are also
electrical insulators, when I bury the pipe I will wrap it completely in
heavy-duty aluminum foil to act as a second Faraday Box.
The
“dead air” space inside the pipe acts as a second layer of insulation
against rapidly changing temperatures and the pipe itself acts as a
second water-proofing device. Since the pipe and endcaps are also
electrical insulators, when I bury the pipe I will wrap it completely in
heavy-duty aluminum foil to act as a second Faraday Box. Remember to cut slits in the aluminum foil along the bottom of the pipe for drainage; the last thing you want is water pooling around your cache. I’m also using the aluminum foil to attach a flat screwdriver to one end of the pipe.
 Well,
there you have it. I’ve done this more times than I could begin to
count and I know that as sure as I sit here, that many years from now,
this HDD can be safety retrieved in pristine condition. I plan to launch
this website about a week or so after burying this cache near a cabin
in the Daniel Boone National Forest. I’ll bury the pipe over the Labor
Day holiday weekend on a ridgeline about 24 inches below the surface,
exactly as it is shown in the above photo.
Well,
there you have it. I’ve done this more times than I could begin to
count and I know that as sure as I sit here, that many years from now,
this HDD can be safety retrieved in pristine condition. I plan to launch
this website about a week or so after burying this cache near a cabin
in the Daniel Boone National Forest. I’ll bury the pipe over the Labor
Day holiday weekend on a ridgeline about 24 inches below the surface,
exactly as it is shown in the above photo. With double redundancies insuring against water damage, electrical surge and condensation, I can rest easy; knowing that all of my digital data is securely protected against anything and everything.
No comments:
Post a Comment