Why Bury? A mirror of How to Bury Your Stuff dot com
How to Bury Your Stuff: The Ultimate Guide to Burying Your Valuables
Because no one can take what they cannot find
 Why
bury? I’ve been asked that question countless times over the years and
my answer is always the same. Because if done properly, it’s the
ultimate security for your valuables; not only is it cheaper than any
alternative but nothing else is as secure, period.
Hiding your valuables under your
mattress or in your sock drawer does not protect against fires or
natural disasters like tornados. Safety deposit boxes can be costly in
that they are an ongoing expense. They can only be accessed during the
bank’s business hours and depend on functioning electricity. Home safes
are expensive; they do not always properly protect your valuables
against fires or floods and can be easily defeated by any intruder with
the proper cutting tools. By burying your valuables underground, one can
guarantee that his or her most precious possessions are forever
protected against theft, fire, extreme weather, most natural disasters
and even the collapse of the electrical grid.
Prior to around 1998, anyone who
buried anything underground was considered paranoid by mainstream
society. The Y2K or “Millennium Bug” changed that. This was the belief
that on December 31st 1999, all computer systems worldwide would crash.
Survivalism or “Prepping” as it is now called, started to become more
popular. Tabloids like CNN started to push scary stories about new
diseases and imminent natural disasters. Television shows and movies
geared around apocalyptic themes grew in popularity, and sensationalism
combined with mistaken beliefs about the Mayan New Year would push
worldwide survival spending past $500 billion during the 2012 fiscal
year.
I originally created this website with
the intent of helping everyone in every demographic group secure their
most valuable possessions. But I am not naïve, I realize that the
majority of my visitors will be survivalists and doomsday preppers. This
brings me to another reason for burying your possessions; an apocalypse
of some sorts. Collapse of the world’s economy, zombies, post peak oil,
Fascist gun confiscations, WMD’s, disease or pandemic, mass starvation
and civil war all seem to be included in today’s popular ideation.
Before I ever heard about something
called the World Wide Web, I had already been burying stuff for about 15
years and I had never lost anything that I put in the ground. One
common myth on the Internet is that it’s illegal to bury, hoard or cache
survival gear and valuables. This is a complete falsehood since
churches, youth groups and schools do it all the time; only they call
their caches “Time Capsules.” In addition, the term “geocaching” is a
term that defines what’s described as a popular outdoor activity in
which participants play a high-tech game of hide-and-seek.
Since the day I first discovered the
Internet, I’ve also seen much chatter about how burying stuff is such a
waste of time and about how easily the government can swoop in with it’s
superior technology and locate everything in the blink of an eye. But
in reality, I can remember several instances during my life where a
small plane like a Piper or a Cessna disappeared over the American or
Canadian Rockies. Despite massive search and rescue operations, a few of
these small aircraft have never been found; and these crash sites were
ABOVE ground.
The fantasy is that the government
knows all and sees all. Using the population of the United States as an
example, no government has the ability to constantly monitor 320 million
people all at once, (although it certainly does try) nor does it have
the resources to scan every inch of U.S. soil. And if no government is
capable of finding a buried stash, then neither are thieves, hackers,
delinquents, drug addicts or looters. Even the most massive illegal drug
farms are either discovered by human intelligence or accidentally
stumbled upon by local law enforcement officers investigating an
unrelated crime; not located by superior government technology as many
would believe.
To this day, there are many
“treasures” (safes and even entire bank vaults are still missing from
heists; millions of dollars in cash and gold bullion from stagecoach
robberies, etc) lost in the old American West that have been buried for
more than 100 years and have yet to be discovered.
Simply put; Burying is the ultimate security. Period.
Why
bury? I’ve been asked that question countless times over the years and
my answer is always the same. Because if done properly, it’s the
ultimate security for your valuables; not only is it cheaper than any
alternative but nothing else is as secure, period.
Hiding your valuables under your
mattress or in your sock drawer does not protect against fires or
natural disasters like tornados. Safety deposit boxes can be costly in
that they are an ongoing expense. They can only be accessed during the
bank’s business hours and depend on functioning electricity. Home safes
are expensive; they do not always properly protect your valuables
against fires or floods and can be easily defeated by any intruder with
the proper cutting tools. By burying your valuables underground, one can
guarantee that his or her most precious possessions are forever
protected against theft, fire, extreme weather, most natural disasters
and even the collapse of the electrical grid.
Prior to around 1998, anyone who
buried anything underground was considered paranoid by mainstream
society. The Y2K or “Millennium Bug” changed that. This was the belief
that on December 31st 1999, all computer systems worldwide would crash.
Survivalism or “Prepping” as it is now called, started to become more
popular. Tabloids like CNN started to push scary stories about new
diseases and imminent natural disasters. Television shows and movies
geared around apocalyptic themes grew in popularity, and sensationalism
combined with mistaken beliefs about the Mayan New Year would push
worldwide survival spending past $500 billion during the 2012 fiscal
year.
I originally created this website with
the intent of helping everyone in every demographic group secure their
most valuable possessions. But I am not naïve, I realize that the
majority of my visitors will be survivalists and doomsday preppers. This
brings me to another reason for burying your possessions; an apocalypse
of some sorts. Collapse of the world’s economy, zombies, post peak oil,
Fascist gun confiscations, WMD’s, disease or pandemic, mass starvation
and civil war all seem to be included in today’s popular ideation.
Before I ever heard about something
called the World Wide Web, I had already been burying stuff for about 15
years and I had never lost anything that I put in the ground. One
common myth on the Internet is that it’s illegal to bury, hoard or cache
survival gear and valuables. This is a complete falsehood since
churches, youth groups and schools do it all the time; only they call
their caches “Time Capsules.” In addition, the term “geocaching” is a
term that defines what’s described as a popular outdoor activity in
which participants play a high-tech game of hide-and-seek.
Since the day I first discovered the
Internet, I’ve also seen much chatter about how burying stuff is such a
waste of time and about how easily the government can swoop in with it’s
superior technology and locate everything in the blink of an eye. But
in reality, I can remember several instances during my life where a
small plane like a Piper or a Cessna disappeared over the American or
Canadian Rockies. Despite massive search and rescue operations, a few of
these small aircraft have never been found; and these crash sites were
ABOVE ground.
The fantasy is that the government
knows all and sees all. Using the population of the United States as an
example, no government has the ability to constantly monitor 320 million
people all at once, (although it certainly does try) nor does it have
the resources to scan every inch of U.S. soil. And if no government is
capable of finding a buried stash, then neither are thieves, hackers,
delinquents, drug addicts or looters. Even the most massive illegal drug
farms are either discovered by human intelligence or accidentally
stumbled upon by local law enforcement officers investigating an
unrelated crime; not located by superior government technology as many
would believe.
To this day, there are many
“treasures” (safes and even entire bank vaults are still missing from
heists; millions of dollars in cash and gold bullion from stagecoach
robberies, etc) lost in the old American West that have been buried for
more than 100 years and have yet to be discovered.
Simply put; Burying is the ultimate security. Period.
General Tips
For Burying your Electronics, Guns, Documents and More!
Because no one can take what they cannot find
First time burying something
underground? Feeling paranoid? Don’t worry, burying valuables
underground used to be considered crazy or extreme; but since the Y2K
and Mayan apocalypses, survival prepping has gone mainstream. If you’ve
never considered this option before you will quickly find that there are
dozens of survivalist websites, forums and blogs to get you started.
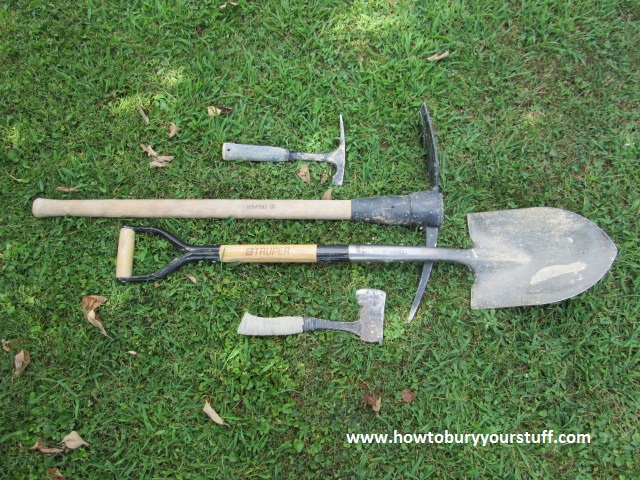
Best tools for digging? …in my humble opinion, are shown in the photo
below. A small hatchet, a small flat pick, a mattock and a shovel should
be all you need. Although I have never needed them, in some situations
you may also find post-hole diggers to be useful.
 A
common term used to define an underground stash is “cache” and here are
10 tips, just some suggestions to consider in order to give your
valuables maximum security.
1 – I would feel remiss if I didn’t
state the obvious. Do not tell anyone where your cache is, no one,
period. Not your spouse, best friend or child. That one person who you
really really trust will tell someone else that they really really trust
and so on. Ensure that no one follows you to your caching location and
do not repeatedly travel back and forth. Do not draw any maps or
directions; the only directions should be the ones locked away in your
own memory. If you can help it, don’t even tell anyone that you have a
cache at all. Be creative and build multiple caches as backup or you
could even ‘mark’ a false location as a dummy cache.
2 – If you are concerned about hackers
or electronic surveillance then don’t use your Garmin to locate your
hiding spot. When digging or checking on your underground cache, do NOT
take your cellphone with you. Leave all of your electronic devices at
home, including your digital camera. You do not want any electronic
record of you ever having been at this location. Also remember that your
vehicle’s Tom-Tom, OnStar or LoJack can also be your undoing.
3 – Remember “High and Dry” and stay
away from lakes, rivers, valleys and any flat area of ground. The water
table of any flat area, regardless of elevation, can hold large amounts
of water for an extended time. You want to dig on hilltops, hillsides
and ridges; far away and above any body of water.
4 – When choosing a location, try to
find a place as close to home as possible but far enough away that it
cannot be found by simply sweeping your backyard with a metal detector.
If you live in a rural or suburban area, then this should be easy
enough. If you live in a strictly urban setting, then you may be forced
to choose a location that requires driving some distance. In an ideal
situation, you want your cache located on or near a hilltop, in a wooded
area within walking distance of your home that is unlikely to be
disturbed by construction or logging companies.
5 – You’ll have to research your
location’s “frost line” (those who live in Calgary will have to dig
deeper than those who live in Juarez) and try to place the top of your
container at or below that depth. I’ve buried above the frost line
before and never had problems; but if you’re not checking your cache at
least once a year, then you will want to get below the frost line.
Burying above the frost line means extreme changes in temperature that
will cause something called ‘frost heave.’ This can not only actually
move your items around, but can cause condensation inside your
containers. Frost heave can also crush your containers.
6 – Do NOT ‘mark’ your spot. Do not
pound a stake in the ground, put a big rock nearby or tie a rag around a
tree. Markers like these can not only be found by others, but they can
be moved. Depending solely on a marker to find your underground cache
could lead to disaster. You just need to ‘know’ where it is. Pick a
certain tree, curve in the ridge line or an outcropping of rock and
remember it. Also, you will want your underground cache to be located
somewhere that no one who knows you would ever associate with you. Do
not bury valuables near your favorite camping spot, your favorite
fishing spot or near your deer hunting tree stand. Keep in mind from the
very beginning that if your cache was to be discovered, you’d want
everyone who knows you to think, “Really, he hid his stuff there?”
7 – I’ve traveled considerably and
every small town that I’ve ever lived in had rumors about a nearby creek
where the water flowed uphill. While constructing, arranging, placing
and covering your cache, actually picture the water running uphill and
remember that this is a scientific impossibility. Water flows downhill
and this is the basis for what I call my “Bell Method.” The Bell Method
is based on the fact that you can take an empty drinking glass, turn it
upside down (like a hanging bell) and push it down into a bucket of
water. Anything attached to the bottom of the glass would remain
perfectly dry. I started using this concept during my teenage years and
no matter how deep underwater (within reason) there will always be a
pocket of air inside. In the following webpages, I’ll go into more
detail about the Bell Method and include some photographs.
8 – Insulate whatever you are burying
against rapid changes in temperature. It’s useless to waterproof
something only to have moisture condensate inside your sealed container.
Take an empty 20 ounce Coca-Cola bottle, rinse and dry it out
completely. Screw the lid on tight and alternate placing the empty
bottle in the freezer, then outside on a hot summer day and back in the
freezer again. Sooner or later, if you continue to do this, moisture
will start appearing on the inside of the bottle. This is the exact same
thing that can easily happen to all of your ammunition, each circuit
board, each paper document and each firearm you bury underground.
Burying below your area’s frost line and using temperature insulation is
critical.
9 – Steel wool will rust very easily.
Buy some fine grade (0000) and place a piece of it with whatever you are
burying. Say for instance, that you dig up your cache once a year and
check everything out. Every year you should place that exact same piece
of steel wool back into your container(s), if the year ever comes when
it suddenly has rust on it; then you know that you have a problem.
10 – Lastly, I want to reemphasize my
first tip. Do not tell anyone anything about the location of your
underground cache. Burying your valuables keeps them absolutely safe
because of the single solitary fact that no one knows where they are. If
your geocaching is the result of a group project, then make damn sure
you can trust your fellow preppers with both your property and quite
possibly your life; furthermore, whether you are digging in an urban,
suburban or rural environment remember that there are probably more
people watching you than you realize. Use common sense when traveling to
and from your location, wear camouflage or dark clothing and try be
quiet when digging. Be sneaky, dig at 4:00am during a full moon without
using a flashlight or be creative; only visit your cache during a severe
thunderstorm.
A
common term used to define an underground stash is “cache” and here are
10 tips, just some suggestions to consider in order to give your
valuables maximum security.
1 – I would feel remiss if I didn’t
state the obvious. Do not tell anyone where your cache is, no one,
period. Not your spouse, best friend or child. That one person who you
really really trust will tell someone else that they really really trust
and so on. Ensure that no one follows you to your caching location and
do not repeatedly travel back and forth. Do not draw any maps or
directions; the only directions should be the ones locked away in your
own memory. If you can help it, don’t even tell anyone that you have a
cache at all. Be creative and build multiple caches as backup or you
could even ‘mark’ a false location as a dummy cache.
2 – If you are concerned about hackers
or electronic surveillance then don’t use your Garmin to locate your
hiding spot. When digging or checking on your underground cache, do NOT
take your cellphone with you. Leave all of your electronic devices at
home, including your digital camera. You do not want any electronic
record of you ever having been at this location. Also remember that your
vehicle’s Tom-Tom, OnStar or LoJack can also be your undoing.
3 – Remember “High and Dry” and stay
away from lakes, rivers, valleys and any flat area of ground. The water
table of any flat area, regardless of elevation, can hold large amounts
of water for an extended time. You want to dig on hilltops, hillsides
and ridges; far away and above any body of water.
4 – When choosing a location, try to
find a place as close to home as possible but far enough away that it
cannot be found by simply sweeping your backyard with a metal detector.
If you live in a rural or suburban area, then this should be easy
enough. If you live in a strictly urban setting, then you may be forced
to choose a location that requires driving some distance. In an ideal
situation, you want your cache located on or near a hilltop, in a wooded
area within walking distance of your home that is unlikely to be
disturbed by construction or logging companies.
5 – You’ll have to research your
location’s “frost line” (those who live in Calgary will have to dig
deeper than those who live in Juarez) and try to place the top of your
container at or below that depth. I’ve buried above the frost line
before and never had problems; but if you’re not checking your cache at
least once a year, then you will want to get below the frost line.
Burying above the frost line means extreme changes in temperature that
will cause something called ‘frost heave.’ This can not only actually
move your items around, but can cause condensation inside your
containers. Frost heave can also crush your containers.
6 – Do NOT ‘mark’ your spot. Do not
pound a stake in the ground, put a big rock nearby or tie a rag around a
tree. Markers like these can not only be found by others, but they can
be moved. Depending solely on a marker to find your underground cache
could lead to disaster. You just need to ‘know’ where it is. Pick a
certain tree, curve in the ridge line or an outcropping of rock and
remember it. Also, you will want your underground cache to be located
somewhere that no one who knows you would ever associate with you. Do
not bury valuables near your favorite camping spot, your favorite
fishing spot or near your deer hunting tree stand. Keep in mind from the
very beginning that if your cache was to be discovered, you’d want
everyone who knows you to think, “Really, he hid his stuff there?”
7 – I’ve traveled considerably and
every small town that I’ve ever lived in had rumors about a nearby creek
where the water flowed uphill. While constructing, arranging, placing
and covering your cache, actually picture the water running uphill and
remember that this is a scientific impossibility. Water flows downhill
and this is the basis for what I call my “Bell Method.” The Bell Method
is based on the fact that you can take an empty drinking glass, turn it
upside down (like a hanging bell) and push it down into a bucket of
water. Anything attached to the bottom of the glass would remain
perfectly dry. I started using this concept during my teenage years and
no matter how deep underwater (within reason) there will always be a
pocket of air inside. In the following webpages, I’ll go into more
detail about the Bell Method and include some photographs.
8 – Insulate whatever you are burying
against rapid changes in temperature. It’s useless to waterproof
something only to have moisture condensate inside your sealed container.
Take an empty 20 ounce Coca-Cola bottle, rinse and dry it out
completely. Screw the lid on tight and alternate placing the empty
bottle in the freezer, then outside on a hot summer day and back in the
freezer again. Sooner or later, if you continue to do this, moisture
will start appearing on the inside of the bottle. This is the exact same
thing that can easily happen to all of your ammunition, each circuit
board, each paper document and each firearm you bury underground.
Burying below your area’s frost line and using temperature insulation is
critical.
9 – Steel wool will rust very easily.
Buy some fine grade (0000) and place a piece of it with whatever you are
burying. Say for instance, that you dig up your cache once a year and
check everything out. Every year you should place that exact same piece
of steel wool back into your container(s), if the year ever comes when
it suddenly has rust on it; then you know that you have a problem.
10 – Lastly, I want to reemphasize my
first tip. Do not tell anyone anything about the location of your
underground cache. Burying your valuables keeps them absolutely safe
because of the single solitary fact that no one knows where they are. If
your geocaching is the result of a group project, then make damn sure
you can trust your fellow preppers with both your property and quite
possibly your life; furthermore, whether you are digging in an urban,
suburban or rural environment remember that there are probably more
people watching you than you realize. Use common sense when traveling to
and from your location, wear camouflage or dark clothing and try be
quiet when digging. Be sneaky, dig at 4:00am during a full moon without
using a flashlight or be creative; only visit your cache during a severe
thunderstorm.
How To Bury: 5 Methods
to Guarantee the Safety of Your Valuables
Because no one can take what they cannot find
Here are 5 methods that myself and
other survivalists have been using successfully for many years. They can
be used by themselves, but since multiple redundancies are best, they
can also be used in any combination that you desire. I’ll start with the
cheapest first and progress to the most expensive, but you should be
aware that money invested has no bearing on the integrity of your cache.
If constructed properly, each of these is just as reliable as the
other.
The Bell Method
The Bell Method is something that I
thought up and named when I was about 12 years old. The concept works on
the simple truth that water cannot run uphill and in 30 years of
digging, this is the least expensive way I’ve ever found that can
guarantee 100% that your gear or valuables stay dry. If you are on a
budget, then use the Bell Method. It’s based on the fact that you can
take an empty drinking glass, turn it upside down (like a hanging bell)
and push it down into a bucket of water. Anything attached to the inside
of the bottom of the glass will remain perfectly dry.
A hanging bell is represented by any
upside down container that is constructed out of a single piece of
plastic, aluminum or galvanized steel. Any size or shape Tupperware
container or plastic storage tote should work just fine. Choose your
container and another container big enough to hold the first.
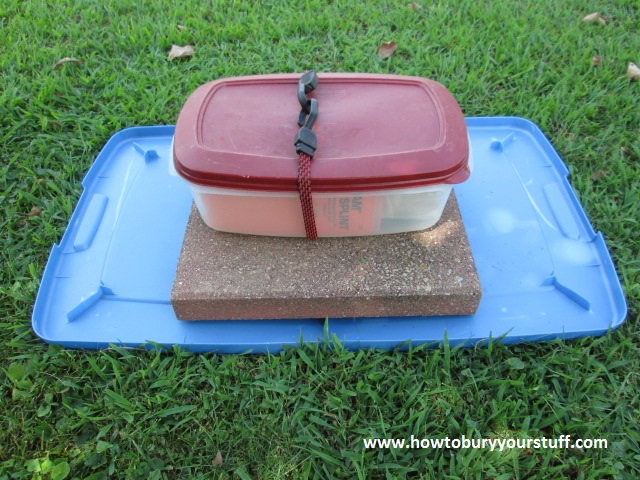
 Dig
a hole in the ground appropriately sized for the larger of the two
containers, as the larger container will be used to make the bell. Make
sure to measure your depth to allow for your area’s frost line and the
height of the container. As you can see by the photo below, lay the lid
in the hole and weight it with rocks or bricks.
The primary purpose of these rocks or
bricks will be to keep your smaller container up towards the bottom of
the upside-down larger container (the top of the bell) and out of the
water. The Bell Method includes these rocks or bricks through the
assumption that your bell may not be perfectly level and perpendicular
to the pull of gravity. Even if you use a leveling tool, changing
temperatures can shift, pivot or move your bell causing it to lose it’s
perfect level. The rocks or bricks allow for some water to enter the
bottom of your bell and hold your precious valuables up out of the
water. In the example given in the photograph, the second Tupperware
container would float toward the top of the bell in the event that water
entered the cache.
Dig
a hole in the ground appropriately sized for the larger of the two
containers, as the larger container will be used to make the bell. Make
sure to measure your depth to allow for your area’s frost line and the
height of the container. As you can see by the photo below, lay the lid
in the hole and weight it with rocks or bricks.
The primary purpose of these rocks or
bricks will be to keep your smaller container up towards the bottom of
the upside-down larger container (the top of the bell) and out of the
water. The Bell Method includes these rocks or bricks through the
assumption that your bell may not be perfectly level and perpendicular
to the pull of gravity. Even if you use a leveling tool, changing
temperatures can shift, pivot or move your bell causing it to lose it’s
perfect level. The rocks or bricks allow for some water to enter the
bottom of your bell and hold your precious valuables up out of the
water. In the example given in the photograph, the second Tupperware
container would float toward the top of the bell in the event that water
entered the cache.
 Also
note that should a torrential downpour of rain literally saturate the
ground, the air bubble inside the bell will create a very powerful
positive buoyancy. It is critical that you bury your container deep
enough that the weight of the soil is heavy enough to hold it down; if
you must bury this shallow then I recommend placing rocks or bricks on
top of the bell for added weight.
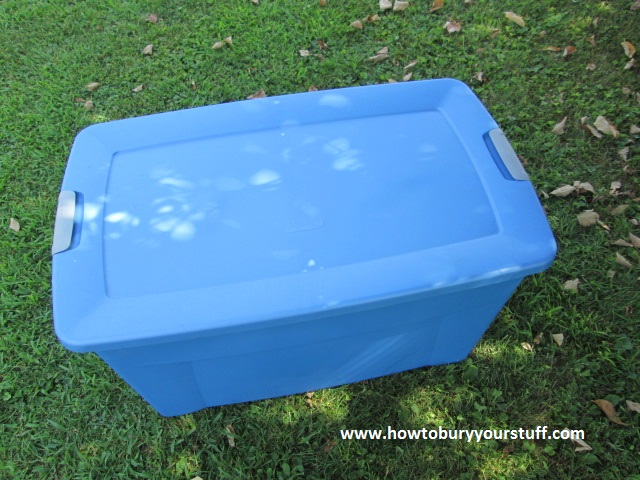
I would not normally use a storage
tote of this size; only doing so as an example for this website. If the
bell is not deep enough (6 inches or so) and not heavy enough, it can
actually bob to the surface by slowly breaking through a thin layer of
soil; so bury it deep; at least 18 inches for larger containers; but use
common sense when deciding on depth versus the strength of your bell.
For example, if you are burying at a depth of 5 or 6 feet, a Tupperware
storage tote like this one will most certainly collapse from the weight
of that much dirt. Consider using a plastic drum or buying a pickup
truck’s fuel tank from a junkyard.
I’ve had people in New Jersey,
Missouri and Tennessee inform me that their underground bells had only
been slightly dislodged after as many as 8 years underground; and that
their precious cargo was in perfect condition, just as it was the day
that they buried it.
On my ‘Tips and Tricks page’ I show
several containers that can be found around the house or in the garage
that make excellent Bell Method candidates.
Also
note that should a torrential downpour of rain literally saturate the
ground, the air bubble inside the bell will create a very powerful
positive buoyancy. It is critical that you bury your container deep
enough that the weight of the soil is heavy enough to hold it down; if
you must bury this shallow then I recommend placing rocks or bricks on
top of the bell for added weight.
I would not normally use a storage
tote of this size; only doing so as an example for this website. If the
bell is not deep enough (6 inches or so) and not heavy enough, it can
actually bob to the surface by slowly breaking through a thin layer of
soil; so bury it deep; at least 18 inches for larger containers; but use
common sense when deciding on depth versus the strength of your bell.
For example, if you are burying at a depth of 5 or 6 feet, a Tupperware
storage tote like this one will most certainly collapse from the weight
of that much dirt. Consider using a plastic drum or buying a pickup
truck’s fuel tank from a junkyard.
I’ve had people in New Jersey,
Missouri and Tennessee inform me that their underground bells had only
been slightly dislodged after as many as 8 years underground; and that
their precious cargo was in perfect condition, just as it was the day
that they buried it.
On my ‘Tips and Tricks page’ I show
several containers that can be found around the house or in the garage
that make excellent Bell Method candidates.
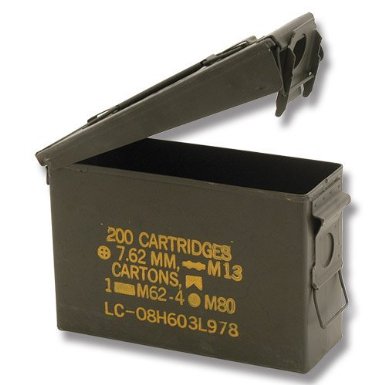
Surplus Ammo Can
Surplus military ammo cans are the
best! They are not as cheap as they once were but are still very
affordable. The ease of opening and closing the can is the greatest
thing about them. You don’t need silicone, grease or epoxy to seal them
and you don’t need tools to get one open. Just pop it open and pop it
closed.
Don’t purchase the new plastic kind
and don’t buy a used one that is rusted or severely dented. The original
issue “old school” metal ones from the Vietnam era are the best. When
buying surplus ammo cans, inspect the rubber seal on the lid. Ensure
that this gasket is intact with no damage or dry-rot and you’re in
business.
One cool thing about metal ammo cans
is that they function as excellent EMP shields or Faraday Boxes. They
are in fact, specifically designed to shield ammunition and AP mine
detonators from EMP while on the battlefield. Any electronic devices
placed inside the closed box and NOT touching the metal body of the can
will be protected against electromagnetic surge of any kind.
I use ammo cans when I’m burying from
depths ranging from 3-5ft deep or when I’m burying for long periods of
time. There’s not much else to say about them. They are inexpensive,
tough and will more than likely remain watertight long after we are all
dead and buried ourselves.
PVC Pipe
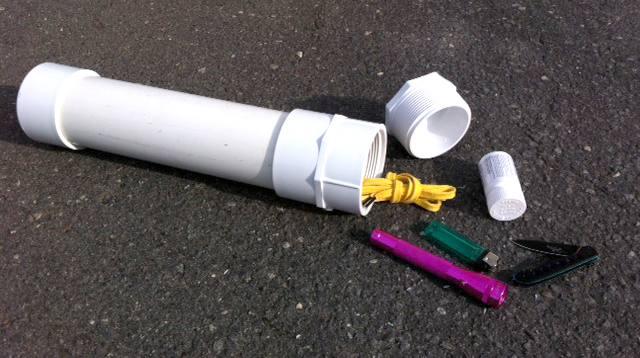
This is a popular method used by
preppers and survivalists worldwide. Buy a piece of 6” PVC conduit or
sewer pipe and some rubber endcaps. You’ll also want some epoxy resin
and some wheel bearing grease or Vaseline.
Cut the pipe to fit whatever you are
burying and allow yourself a little extra length; better to be too long
than too short. Personally, I use epoxy resin to permanently seal one
end with a rubber endcap. After loading my valuables, I use grease or
Vaseline to seal the other end, the “door.” I then mark each end and out
of sheer habit, I bury the section of pipe with the permanently sealed
end slightly uphill of the door. This is probably unnecessary, just a
habit of mine. In this photo, they used threaded endcaps.
 If
you are planning on leaving your cache unattended for more than 5
years, it won’t hurt to spray paint the entire thing with a good enamel
or cover it with a plastic sheet. I do this to prevent dry-rot on the
endcaps and once again, this practice is also probably unnecessary and
just another one of my paranoid quirks.
Don’t forget to stick a screwdriver in
a Zip-Loc baggie and bury it with your PVC pipe. Amusingly enough, I
can personally attest that without a screwdriver, a knife or a dime,
they are frustratingly impossible to get open.
If
you are planning on leaving your cache unattended for more than 5
years, it won’t hurt to spray paint the entire thing with a good enamel
or cover it with a plastic sheet. I do this to prevent dry-rot on the
endcaps and once again, this practice is also probably unnecessary and
just another one of my paranoid quirks.
Don’t forget to stick a screwdriver in
a Zip-Loc baggie and bury it with your PVC pipe. Amusingly enough, I
can personally attest that without a screwdriver, a knife or a dime,
they are frustratingly impossible to get open.
The FoodSaver Vacuum
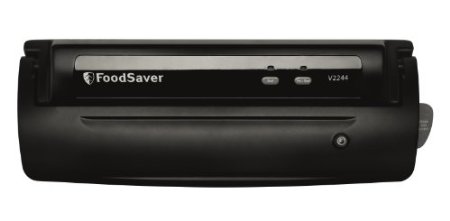
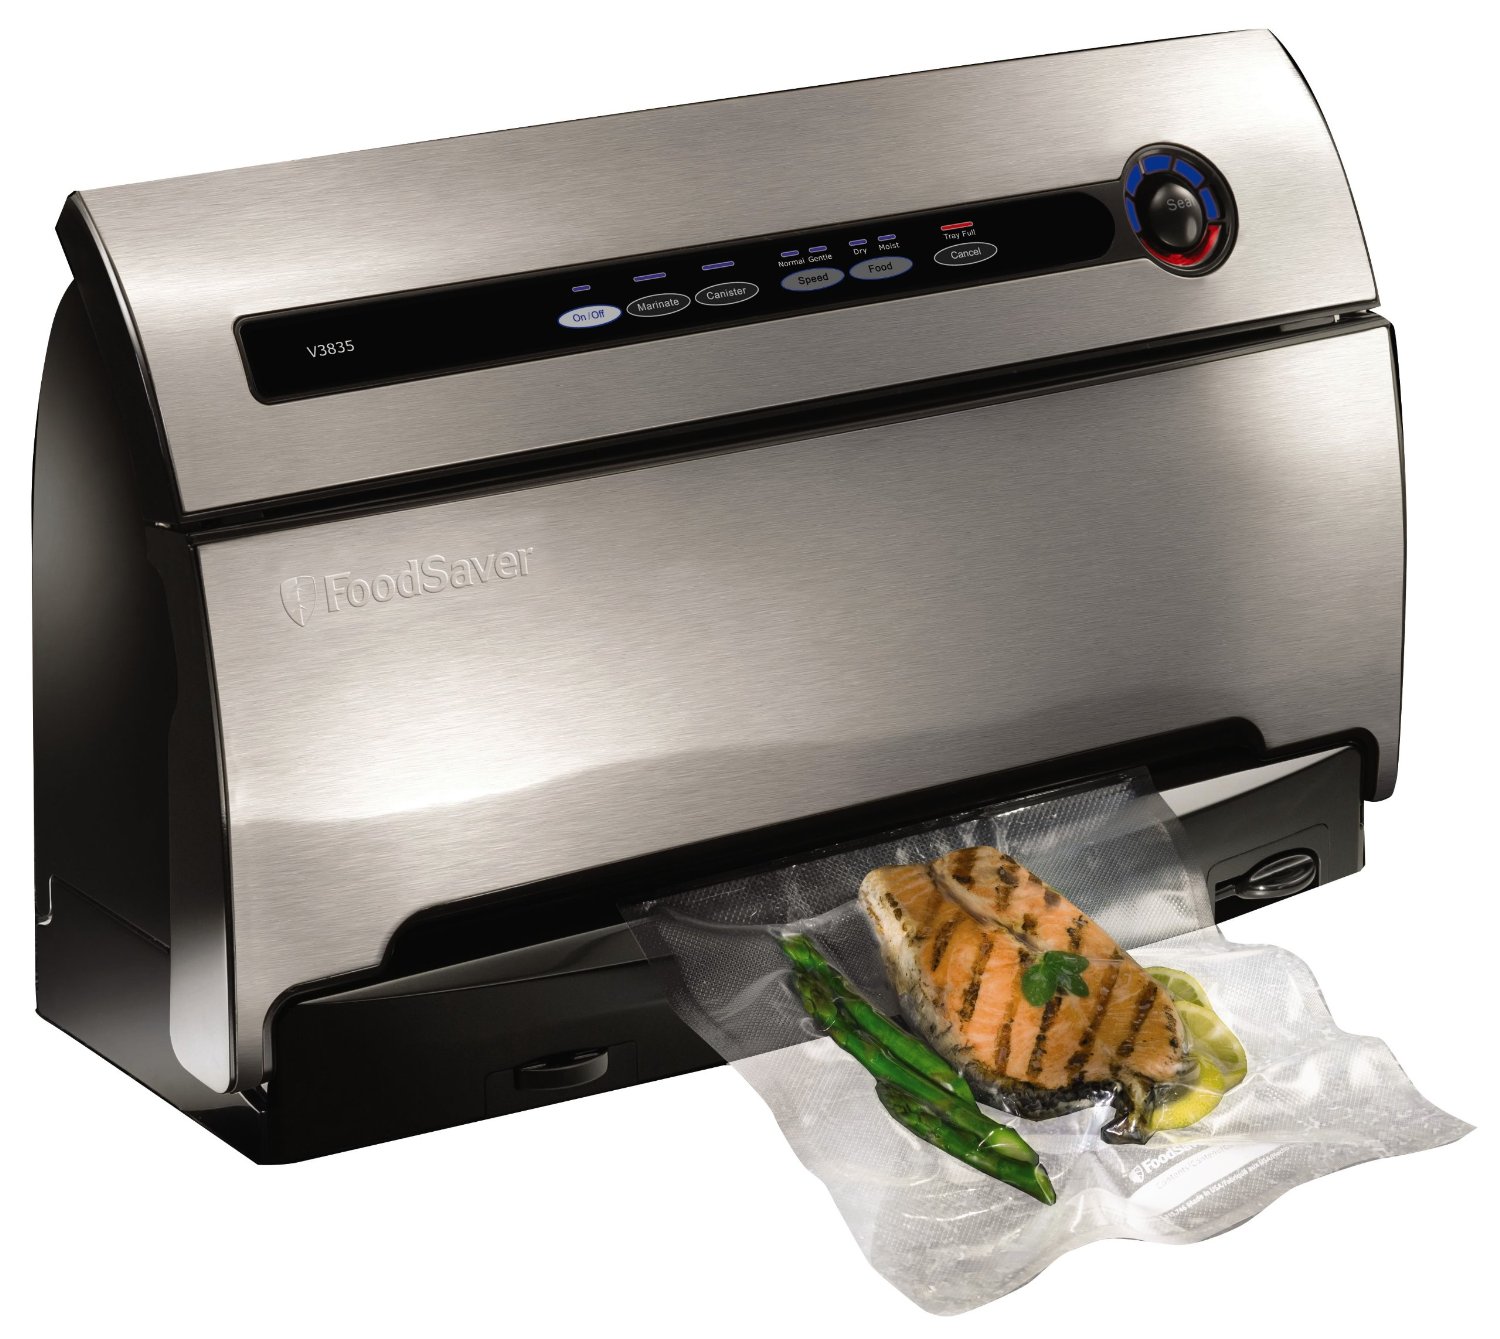
These vacuum machines usually run from
$80 to $200 and use plastic bags that are designed to prevent or
postpone freezer burn in frozen foods. These things are not cheap,
however you will find they are quite useful in the kitchen, and they
really do seal permanently. Here’s the cool thing though, you can use
them for anything at all; if it will fit in the bag, it will seal it.
You can dump in whatever you want.
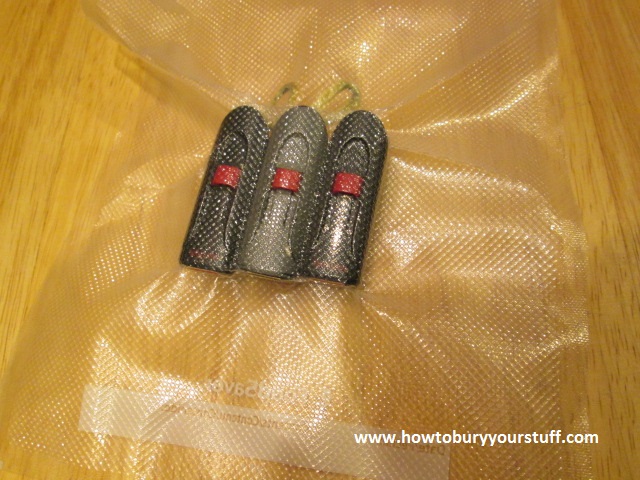
Handfuls of bullets, USB flashdrives or even paper products like a
ledger, diary or photographs, then simply seal the bag. I’ve included
another photo and my only advice about this method would be to try to
use desiccant if possible.
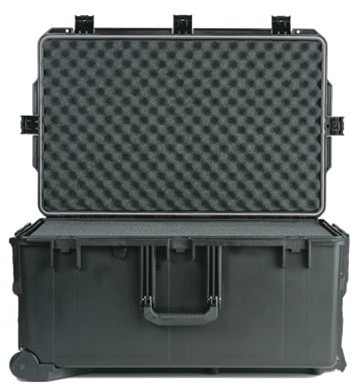
 Pelican cases
Pelican Products was founded in the
1970′s. They make versatile and superior waterproof cases worthy of
respect; and they are also priced accordingly. Sorry, but if you want
“the best” then you’ll have to pay for it.
Pelican makes a variety of cases in
different sizes and shapes that come guaranteed and under warranty. You
can buy a case fitted for your external hard drive or for your favorite
rifle. They make specialized and general purpose containers in almost
any size you could possibly desire.
My Personal Cache – A Step-by-Step Guide
How to Bury Your Stuff: The Ultimate Step-by-Step Guide
Because no one can take what they cannot find
Take an empty 20 ounce Coca-Cola
bottle, rinse and dry it out completely. Screw the lid on tight and
alternate placing the empty bottle in the freezer, then outside on a hot
summer day and back in the freezer again. Sooner or later, if you
continue to do this, moisture will start appearing on the inside of the
bottle. This is the exact same thing that can easily happen to all of
your electronic circuit boards. To guard against this, I will be going
through a step-by-step process and showing you exactly how I am caching
my own external hard drive.
For this demonstration, I’m going to
be copying my laptop’s files onto an external hard drive. I will then
cache this hard drive at another location, but first I will be
photographing the steps I am taking in order to show you the proper way
to shield your electronics and digital devices from both condensation
and electro-magnetic pulse.
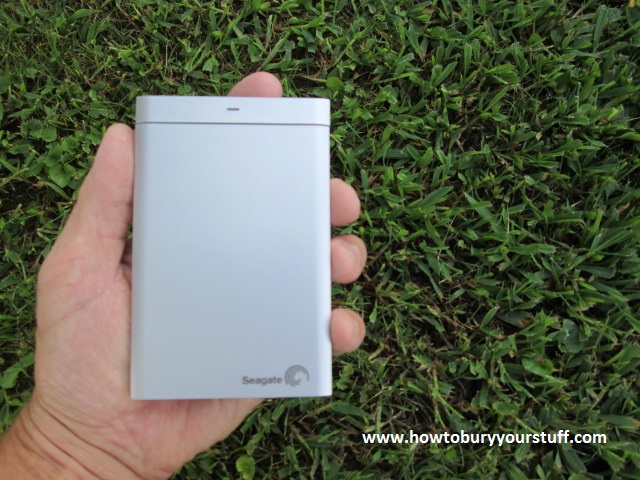
In this photo, you can see my silver Seagate 1tb Backup Plus HDD.
 This
Seagate HDD model has moving parts that may not withstand long-term
exposure to moisture and extreme temperatures; so while burying this
particular hard-drive, it will be critical that I dig below the
frost-line. When burying digital storage devices, it’s preferable to use
an SSD (solid-state drive) whenever possible; they are expensive but
also incredibly tough and able to handle many times the abuse.
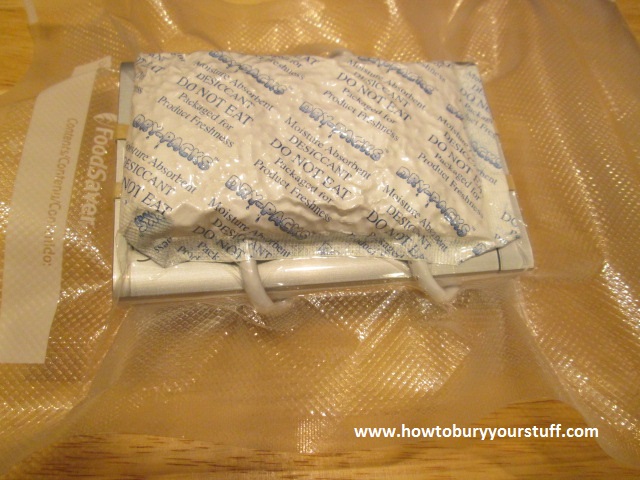
I have already saved my laptop’s
important files (music, photos, vacation videos and a couple of my
favorite films) to the HDD and then placed it inside a FoodSaver vacuum
bag with two bags of desiccant.
This
Seagate HDD model has moving parts that may not withstand long-term
exposure to moisture and extreme temperatures; so while burying this
particular hard-drive, it will be critical that I dig below the
frost-line. When burying digital storage devices, it’s preferable to use
an SSD (solid-state drive) whenever possible; they are expensive but
also incredibly tough and able to handle many times the abuse.
I have already saved my laptop’s
important files (music, photos, vacation videos and a couple of my
favorite films) to the HDD and then placed it inside a FoodSaver vacuum
bag with two bags of desiccant.
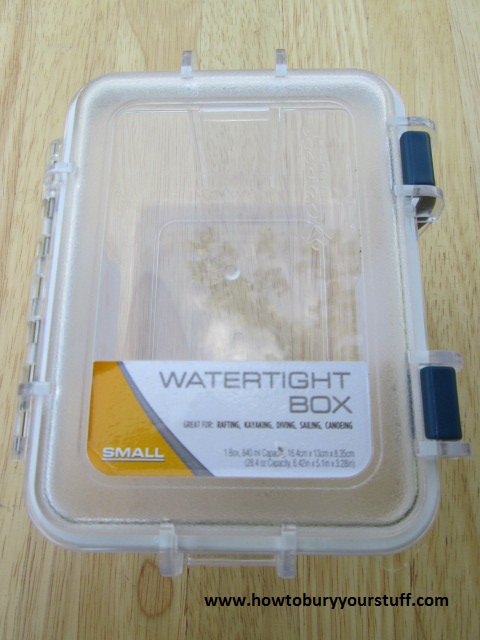
 I
then wrapped the FoodSaver bag with a cotton t-shirt for temperature
insulation and placed the wrapped HDD inside an Outdoor Products brand
dry box. These little things are great for water-sports, however after
about 3 years the seals will start to dry-rot. So if you’re caching for
several years, use all-purpose silicone around the seal. If you prefer,
substitute a small Tupperware container in place of the dry box. You
will still need to use all-purpose silicone to seal the lid and I would
wrap it with half a roll of tightly-bound electrical tape for insurance.
I
then wrapped the FoodSaver bag with a cotton t-shirt for temperature
insulation and placed the wrapped HDD inside an Outdoor Products brand
dry box. These little things are great for water-sports, however after
about 3 years the seals will start to dry-rot. So if you’re caching for
several years, use all-purpose silicone around the seal. If you prefer,
substitute a small Tupperware container in place of the dry box. You
will still need to use all-purpose silicone to seal the lid and I would
wrap it with half a roll of tightly-bound electrical tape for insurance.

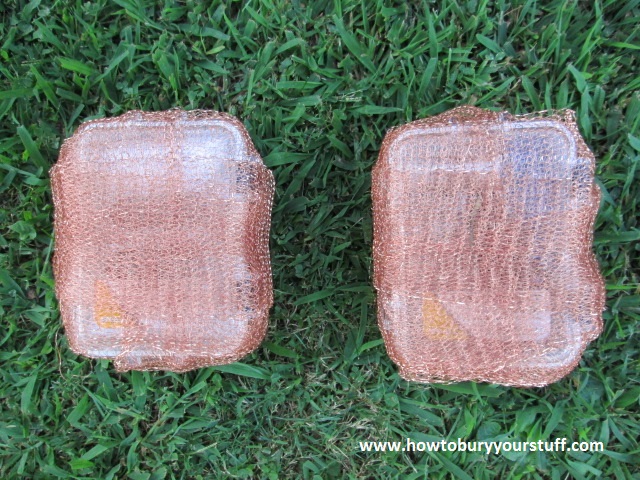
I now have a Seagate 1tb Backup Plus
inside a sealed container made completely out of plastic and silicone,
both of which are good electrical insulators. I want to shield my
hard-drive from electro-magnetic pulse (EMP) so I’m going to construct
what is called a Faraday Cage. I won’t go into details about how the
Faraday works, there is plenty of data available elsewhere online. As
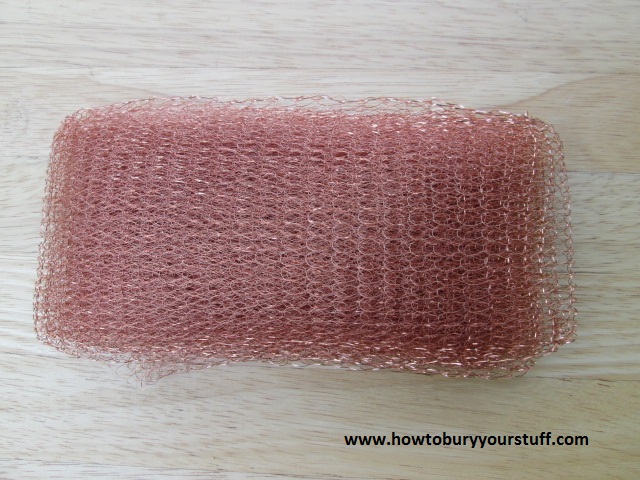
you can see below, I’ve wrapped this plastic container with copper mesh,
successfully shielding my HDD from electrical disturbances.
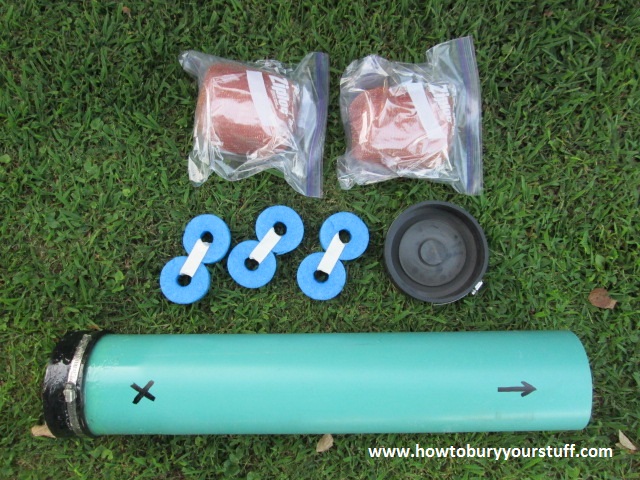
 At the last minute, I have decided to
add several more items, including another Outdoor Products dry box to
this cache. The second dry box contains an extra pair of reading
glasses, a pocketknife and a few other personal items. I will be using
sections of foam swimming pool “noodles” to keep the boxes evenly spaced
while inside the tube. This practice maintains a good temperature
buffer and also prevents damage during transport by holding everything
inside the tube in place.
As you can see in the photo below, the
two boxes and the styrofoam noodle “spacers” will only take up about
two-thirds the length of the pipe. The remaining space will be used for a
few more personal items; I’ll leave it to your imagination what they
might be.
At the last minute, I have decided to
add several more items, including another Outdoor Products dry box to
this cache. The second dry box contains an extra pair of reading
glasses, a pocketknife and a few other personal items. I will be using
sections of foam swimming pool “noodles” to keep the boxes evenly spaced
while inside the tube. This practice maintains a good temperature
buffer and also prevents damage during transport by holding everything
inside the tube in place.
As you can see in the photo below, the
two boxes and the styrofoam noodle “spacers” will only take up about
two-thirds the length of the pipe. The remaining space will be used for a
few more personal items; I’ll leave it to your imagination what they
might be.
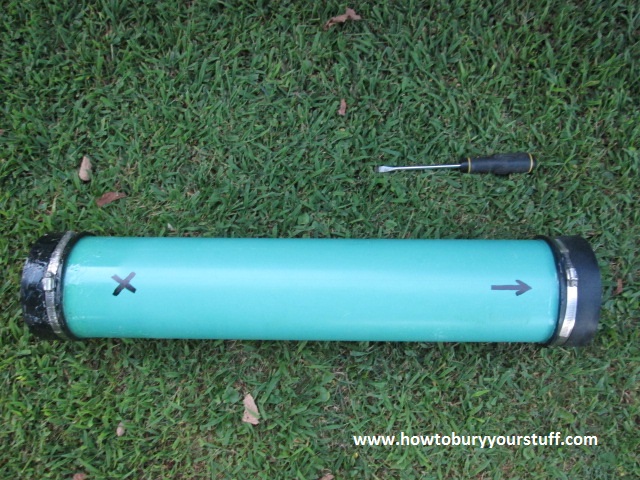
 I
have taken both of my Outdoor Product dry boxes and placed them inside a
section of 6-inch PVC sewer pipe. I’ve used epoxy resin to seal one end
and petroleum jelly to seal the other; using a permanent marker to
designate which end of the pipe can be opened and which cannot.
I
have taken both of my Outdoor Product dry boxes and placed them inside a
section of 6-inch PVC sewer pipe. I’ve used epoxy resin to seal one end
and petroleum jelly to seal the other; using a permanent marker to
designate which end of the pipe can be opened and which cannot.
 The
“dead air” space inside the pipe acts as a second layer of insulation
against rapidly changing temperatures and the pipe itself acts as a
second water-proofing device. Since the pipe and endcaps are also
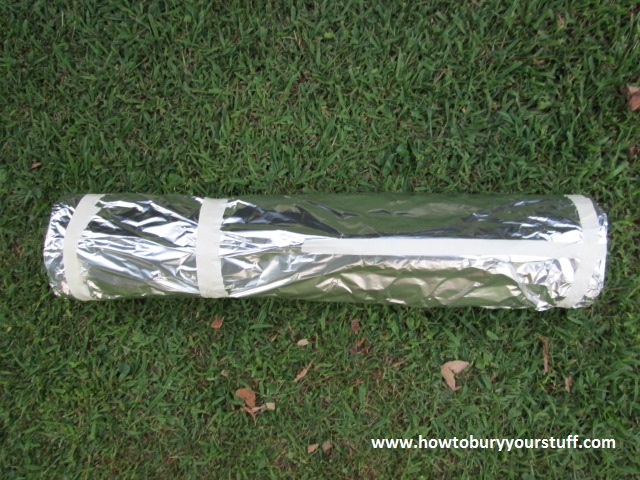
electrical insulators, when I bury the pipe I will wrap it completely in
heavy-duty aluminum foil to act as a second Faraday Box.
Remember to cut slits in the aluminum
foil along the bottom of the pipe for drainage; the last thing you want
is water pooling around your cache. I’m also using the aluminum foil to
attach a flat screwdriver to one end of the pipe.
The
“dead air” space inside the pipe acts as a second layer of insulation
against rapidly changing temperatures and the pipe itself acts as a
second water-proofing device. Since the pipe and endcaps are also
electrical insulators, when I bury the pipe I will wrap it completely in
heavy-duty aluminum foil to act as a second Faraday Box.
Remember to cut slits in the aluminum
foil along the bottom of the pipe for drainage; the last thing you want
is water pooling around your cache. I’m also using the aluminum foil to
attach a flat screwdriver to one end of the pipe.
 Well,
there you have it. I’ve done this more times than I could begin to
count and I know that as sure as I sit here, that many years from now,
this HDD can be safety retrieved in pristine condition. I plan to launch
this website about a week or so after burying this cache near a cabin
in the Daniel Boone National Forest. I’ll bury the pipe over the Labor
Day holiday weekend on a ridgeline about 24 inches below the surface,
exactly as it is shown in the above photo.
With double redundancies insuring
against water damage, electrical surge and condensation, I can rest
easy; knowing that all of my digital data is securely protected against
anything and everything.
Well,
there you have it. I’ve done this more times than I could begin to
count and I know that as sure as I sit here, that many years from now,
this HDD can be safety retrieved in pristine condition. I plan to launch
this website about a week or so after burying this cache near a cabin
in the Daniel Boone National Forest. I’ll bury the pipe over the Labor
Day holiday weekend on a ridgeline about 24 inches below the surface,
exactly as it is shown in the above photo.
With double redundancies insuring
against water damage, electrical surge and condensation, I can rest
easy; knowing that all of my digital data is securely protected against
anything and everything.
Helpful Links and Other Resources
Because no one can take what they cannot find
My first personal goal while
constructing this website was to acknowledge that I am not the only
person skilled when it comes to ditching stuff underground. There are
several other very good references currently available and a few of them
have some experience with aspects of underground caching that I do not.
With that in mind, I thought that I would share a few helpful links.
One of my favorite websites is SurvivalistBoards.com
and they have a survival forum loaded with threads about burying stuff
underground. You can simply search their archives with the keywords
“burying underground” and you’ll get several very good discussions with
some great advice about geocaching weapons, food etc. This website also
has a repository of downloadable PDF’s about survival and prepping. It’s
a friendly and supportive group of people and one of the largest
survival forums that I’ve seen.
Survival Cache has an excellent
article about a wonderful little invention called the “MonoVault.” Since
I personally have no experience with this caching strongbox, I thought
that I would provide the link here
– The MonoVault has a strong reputation and comes in at least three
different sizes. It is not cheap, but like I mentioned earlier about
Pelican, if you want the best you have to pay for it. Even if you never
buy a MonoVault, you should still read this article. You’ll find it
surprisingly informative and well-written; in my humble opinion it’s
probably the best piece of literature about caching underground.
I may be mistaken, but it’s my
understanding that among survivalists and preppers, a man named Jim
Rawles stands out above the rest. He writes a blog where he personally
covers just about every subject that one might envision. He wrote a
piece a few years back about permanent caches… click here to read it
…about which I do have some knowledge and experience but certainly not
as much as Mr Rawles. I may add a webpage later about bigger projects
but even if I do, I would still recommend this link. It’s a detailed and
informative article written by someone with first-hand knowledge and
many years experience.
A post by someone with the username JeepHammer once caught my attention. It’s located at PreparedSociety.com
and it caught my eye because it was intelligently written and also
because apparently I’m not the only person to think of turning caches
upside-down. JeepHammer gives some great advice about waterproofing and
locating a caching spot. He also has some helpful tips for camouflage
and operational security.
If you are burying firearms then you’ll want to check out Great Northern Prepper
…as I’ve not yet gone into great detail about guns and ammo. I do plan
on adding a step-by-step tutorial about burying guns and ammo yet I
would still recommend reading this blog post. The Great Northern Prepper
covers pre-purchase aspects and mentions PVC pipe and the MonoVault; an
excellent and informative article.
I decided that a website dedicated to
underground caching would be incomplete without mentioning this book.
Google search TC-31-29A, it’s the U.S. Army’s technical manual for
caching and it’s available for download on dozens of sites. One word of
caution; this manual has a section on a method called submersion. This
usually involves diving underwater, tying your cache to a moor and using
specialized packaging/containers. Extreme caution should be taken when
employing this method of caching. Use common sense when considering both
water currents during flooding and activities by the general public;
like fishing, that may cause the discovery of your cache or interfere
with your ability to retrieve your cache.
 Why
bury? I’ve been asked that question countless times over the years and
my answer is always the same. Because if done properly, it’s the
ultimate security for your valuables; not only is it cheaper than any
alternative but nothing else is as secure, period.
Why
bury? I’ve been asked that question countless times over the years and
my answer is always the same. Because if done properly, it’s the
ultimate security for your valuables; not only is it cheaper than any
alternative but nothing else is as secure, period.